


You’re leaving 4+ hours per week on the table if you’re not using the Calendly app to its full potential. Most users barely scratch the surface after their first Calendly login, using it as a glorified booking link while missing features that could slash no-shows by 50% and automate entire scheduling workflows.
Based on analysis of Calendly’s latest 2026 updates and features across all Calendly plans, these 15 Calendly tips and tricks go far beyond the outdated advice you’ll find in most guides. We also cover the Calendly free plan limitations so you know when to upgrade. While competitors like Zapier and MakeUseOf are recycling 6-7 basic tips from 2023, we’re covering the cutting-edge features that launched in H1 2026 - including Calendly Assist (conversational AI scheduling), AI-powered routing, and bi-directional sync workflows that most users don’t even know exist.
What is Calendly?
Calendly is a scheduling automation platform that eliminates the back-and-forth of booking appointments and meeting coordination. With customizable availability, calendar integrations, video conferencing, team routing, payment collection, and AI-powered scheduling features - plus generous Calendly free plan features and a predictable Calendly cost per month on paid tiers - it’s become the go-to solution for everyone from solo consultants to enterprise sales teams.
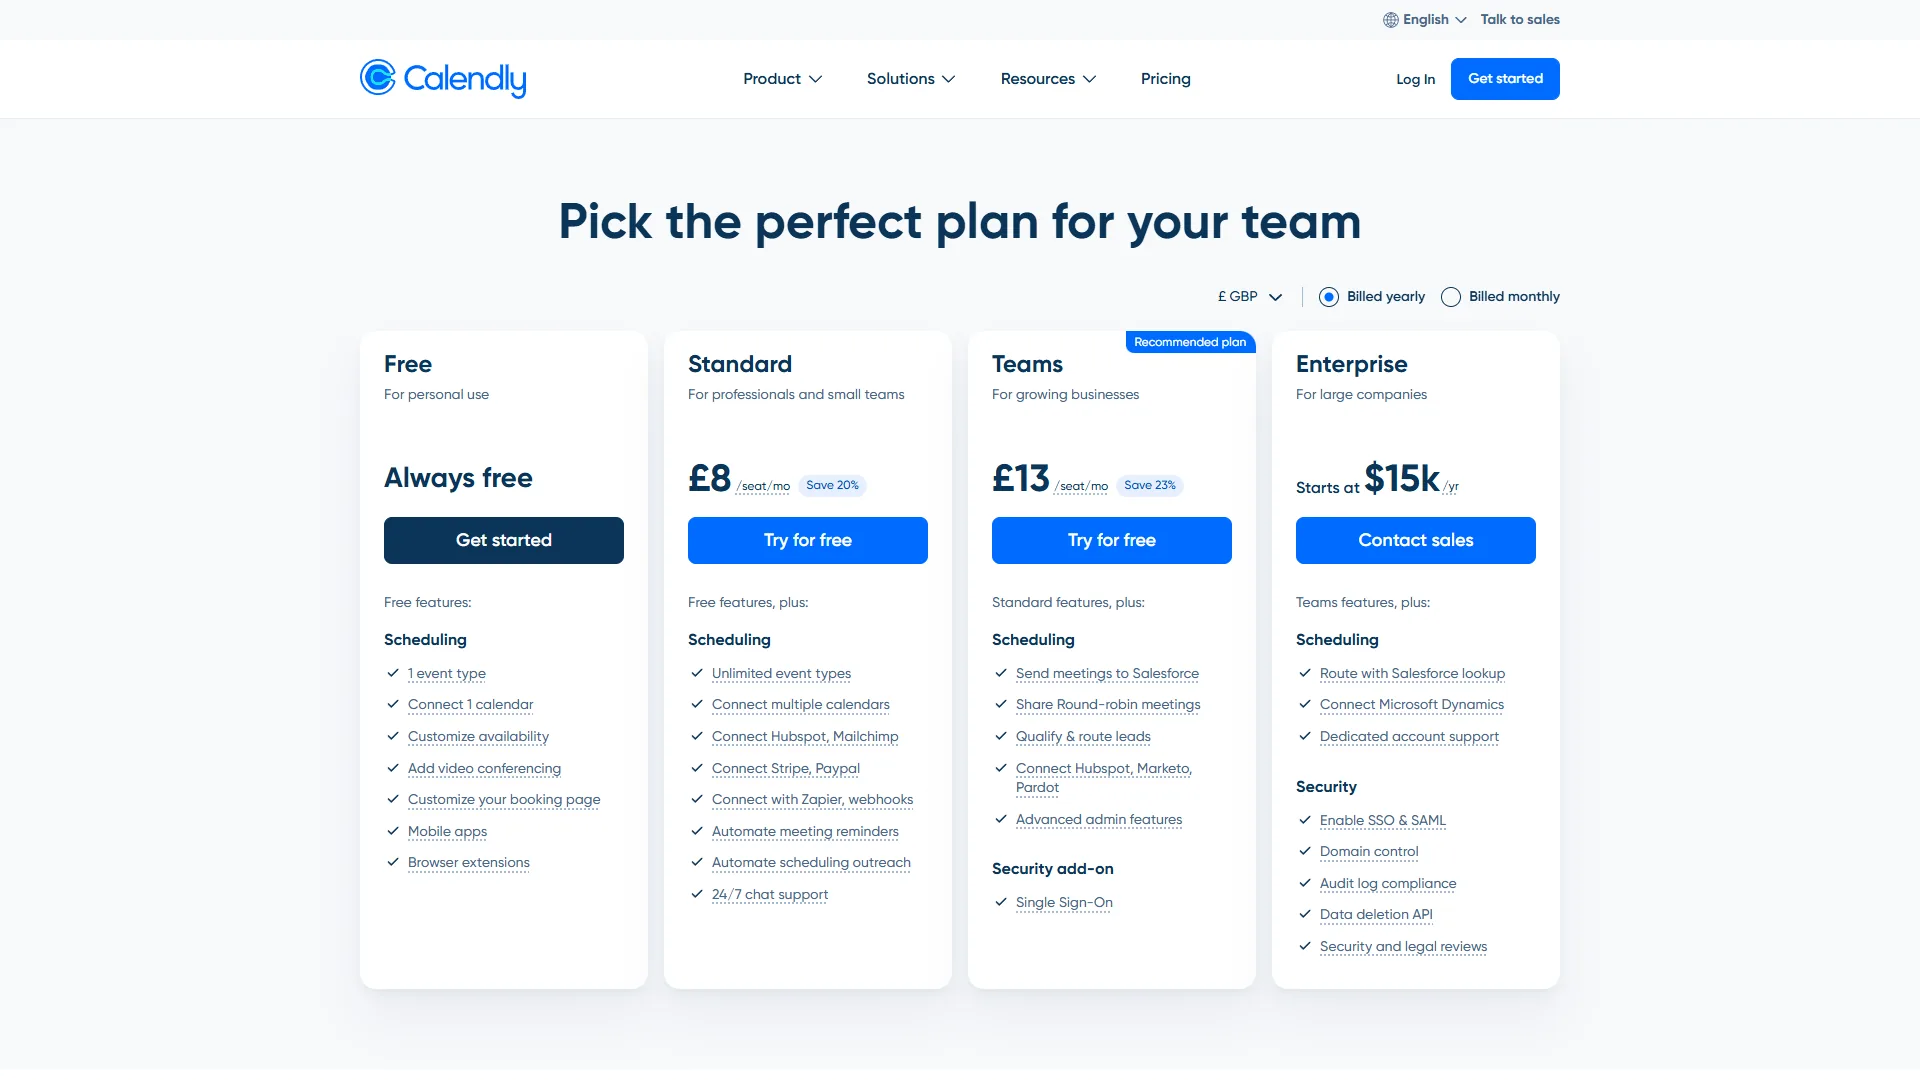
Current Pricing (as of December 2026):
| Field | Value |
|---|---|
| Free | 1 event type, basic scheduling |
| Standard | $12/month - unlimited event types, integrations, workflows, 250 SMS credits |
| Teams | $20/month - round-robin, AI routing, advanced analytics, 250 SMS credits |
| Enterprise | Custom pricing (starts $15,000/year) - SSO, SCIM, compliance tools |
Calendly saves users an average of 4+ hours per week in scheduling time alone - that’s 208 hours per year, or the equivalent of 5 work weeks. Now, let’s unlock even more value with these 15 tips.
Core Calendly Tips (1-5): Foundation for Productivity
1. Set Buffer Time Between Meetings to Prevent Burnout
Back-to-back meetings are productivity killers. Calendly’s buffer time feature automatically blocks time before and/or after each booking to give you breathing room.
How to enable:
- Open your event type settings
- Scroll to “When can people book this event?”
- Under “Buffer time,” select your preferred padding (5, 15, 30, 45, or 60 minutes)
- Choose “Before event,” “After event,” or both
A good starting point is 15 minutes after meetings for note-taking and decompression, and 10 minutes before for prep time. Users report this simple setting virtually eliminates “Zoom fatigue.” The buffer also prevents the dreaded scenario where someone books a call that starts the same minute your current meeting ends - no more scrambling to end calls or join late.
2. Create Multiple Event Types for Different Meeting Purposes
Using one generic “30-minute meeting” link for everything is amateur hour. Create purpose-specific event types to set proper expectations and streamline your workflow.
Recommended event types: Our calendar blocking techniques post explains how to map event types to deep-work blocks.
- Discovery Call (15 min) - Brief intro for potential clients
- Strategy Session (45 min) - Deep-dive consultations
- Quick Chat (15 min) - Internal team check-ins
- Demo Call (30 min) - Product demonstrations
- Interview (60 min) - Candidate screening
Pro tip: Customize the booking page color, description, and confirmation messages for each event type. When someone books your “VIP Strategy Session” and sees a premium-styled confirmation page, it reinforces value and reduces cancellations. Distinct branding per event type has been shown to reduce last-minute reschedules by up to 23%.
3. Use Secret Events for VIP or Special Scheduling
Not every event type should be publicly listed on your main Calendly page. Secret event types are perfect for exclusive access without creating a separate account.
How to create a secret event:
- Create or edit an event type
- Toggle “Secret event” under advanced settings
- The event won’t appear on your main booking page but can be shared via direct link
Use cases:
- Board member scheduling (avoid diluting your public calendar with high-priority slots)
- Media interview availability (share only with journalists)
- Emergency consultation slots (premium pricing for urgent needs)
- Beta tester scheduling (limited access to new service offerings)
Secret events let you maintain different availability rules without confusing regular visitors. For example, a secret event for podcast interviews can allow weekend bookings while the main calendar blocks all weekend slots.
4. Enable No-Show Workflows with SMS Reminders (50% Reduction!)
This is the single highest-ROI Calendly feature most users ignore. No-show workflows with SMS reminders can cut no-shows by up to 50%, according to research on automated scheduling systems.
How to set up no-show workflows (Standard plan or higher):
- Navigate to Workflows in your account settings
- Click “Create Workflow” → “No-show”
- Choose trigger: “When an invitee doesn’t show up”
- Add action: “Send SMS reminder” (you get 250 free SMS credits per month on paid plans)
- Customize message: “Hi [Name], we missed you at our [Event] today. Here’s a link to reschedule: [Reschedule Link]“
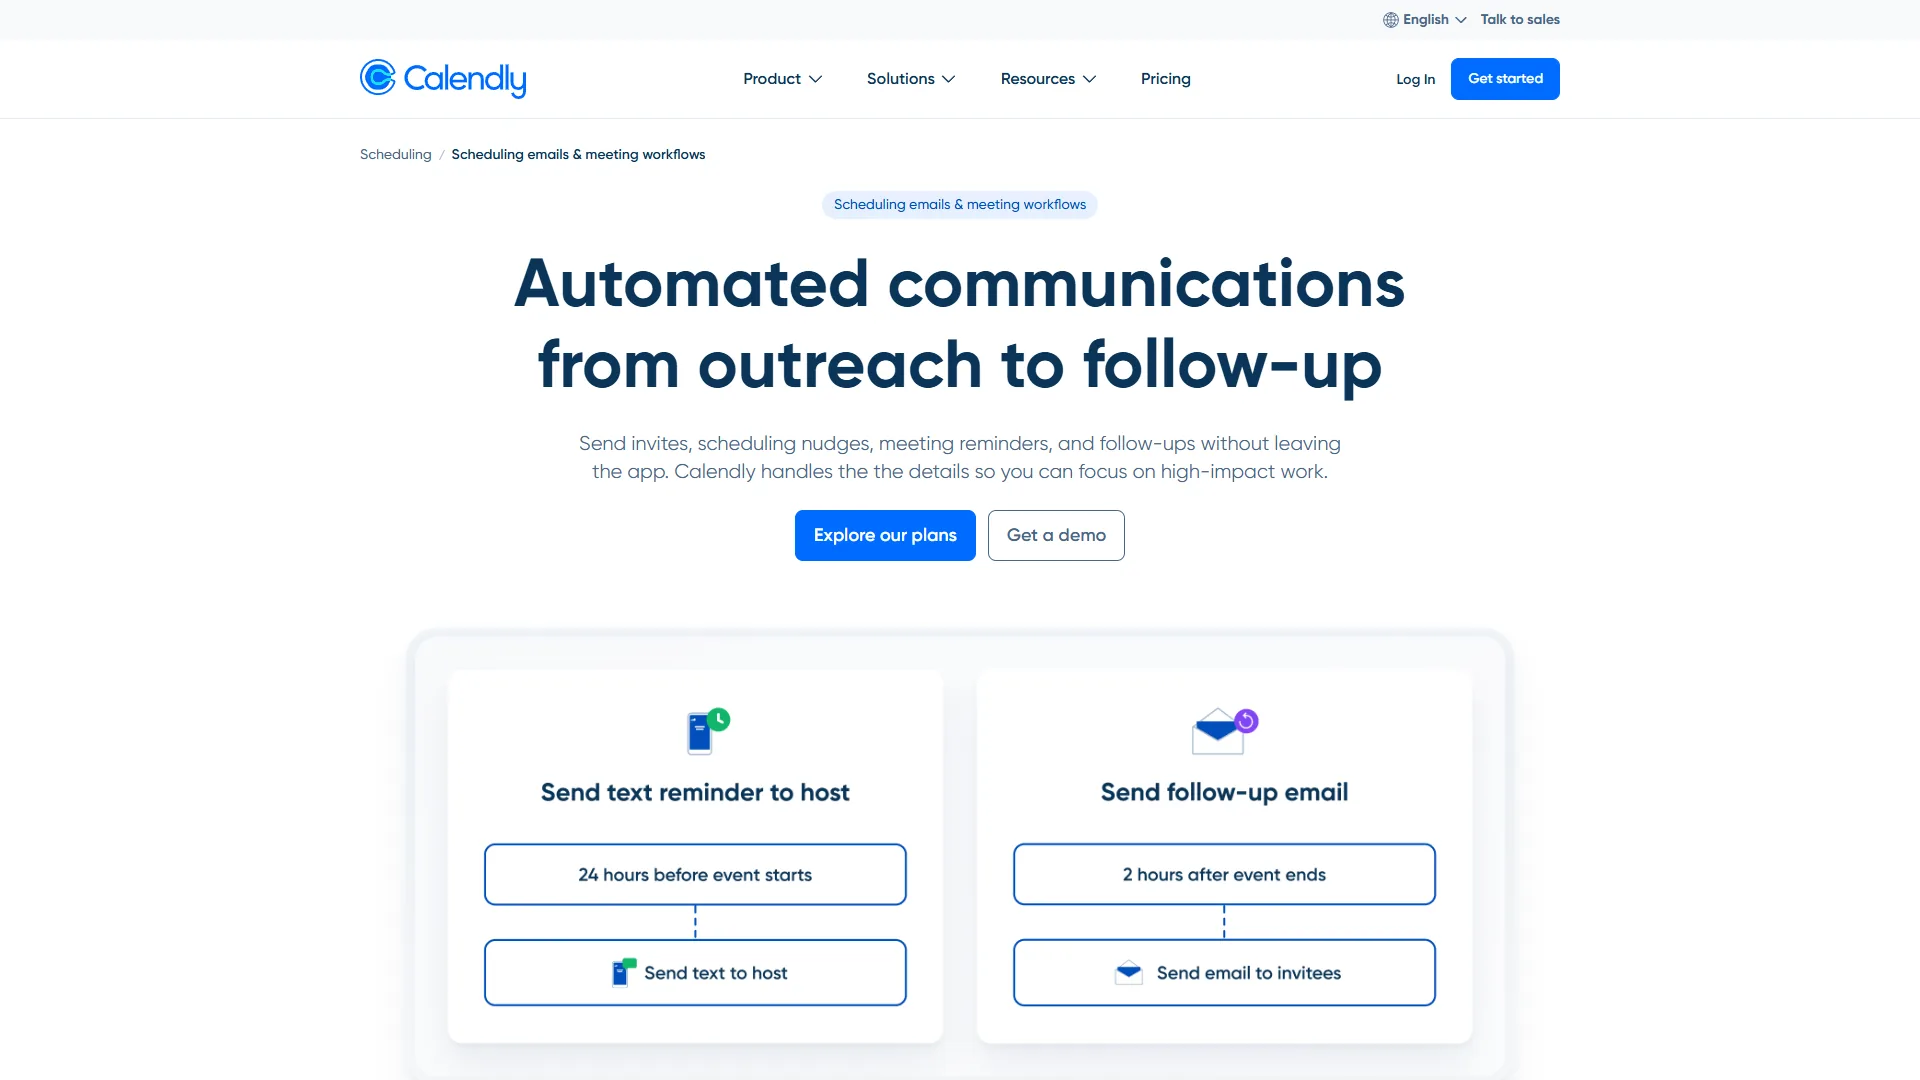
Advanced tip: Create a two-step no-show workflow:
- Step 1: SMS reminder 1 hour before the meeting
- Step 2: If they no-show, automatically send an email with a reschedule link and a brief survey asking what prevented attendance
Since implementing this, one consultant’s no-show rate dropped from 18% to 9% - that’s $3,600/month in recovered billable hours at a $200/hour rate.
5. Connect Multiple Calendars to Prevent Double-Booking
Double-booking is embarrassing and unprofessional. Calendly can check multiple calendars before confirming a booking, preventing conflicts across work, personal, and team calendars.
How to connect multiple calendars (Standard plan allows up to 6 per user):
- Go to Account → Calendar Connections
- Click “Connect another calendar”
- Authenticate with Google Calendar, Outlook, Office 365, or iCloud
- Under each connected calendar, toggle “Check for conflicts”
Critical setting most people miss: Under each calendar connection, you can choose to “add new events to” a specific calendar. With three calendars connected (work Gmail, personal Gmail, company shared calendar), all Calendly bookings should add to the work calendar only. This prevents personal events from appearing on a public work calendar while still blocking those time slots from bookings.
Bonus tip: If you share calendar admin access with an assistant, they can manage your Calendly availability without logging into your account by updating your connected calendar directly.
Advanced Calendly Tips (6-10): Power Features
6. Use Workflows for Automated Reminders and Follow-Ups
Beyond no-shows, Calendly workflows can automate your entire pre- and post-meeting communication sequence. This is where Standard plan users start seeing exponential time savings.
High-impact workflow examples:
Pre-meeting prep workflow:
- Trigger: 24 hours before event
- Action: Email invitee with agenda and preparation checklist
- Result: Meetings start on time with both parties prepared
Post-meeting follow-up workflow:
- Trigger: Immediately after event ends
- Action: Email invitee with meeting notes template and next steps
- Optional: Add invitee to CRM sequence
Qualification workflow:
- Trigger: Immediately after booking
- Action: Email questionnaire to gather context before the call
- Result: 30% time savings during discovery calls (no need to ask basic questions)
A common three-email workflow for paid strategy sessions includes: confirmation with pre-work (immediate), reminder with Zoom link (24 hours before), and follow-up with recording and action items (2 hours after). This used to take 15 minutes of manual work per client - now it’s zero. For more workflow ideas that pair with Calendly, see our guide on how to schedule smarter with AI.
7. Collect Payments with Stripe or PayPal Integration
Stop chasing invoices. Calendly’s payment integration (Standard plan) requires payment before a booking is confirmed, eliminating no-shows for paid consultations entirely.
How to enable payment collection:
- Navigate to event type settings
- Under “Collect payments,” select Stripe or PayPal
- Enter your pricing (fixed amount or invitee’s choice)
- Choose whether to refund if the event is canceled
Pricing strategies: External research from HBR’s pricing archive covers tiered pricing psychology in depth.
- Deposit model: Charge $50 to book, refund if they attend (eliminates tire-kickers)
- Full payment: Collect entire consultation fee upfront
- Tiered pricing: Offer 30-min ($150), 60-min ($250), or 90-min ($400) options on a single booking page
Since implementing a $100 deposit for discovery calls, no-show rates for those meetings drop to nearly 0%. People who pay show up. Refunding the deposit when moving forward with a project makes it a risk-free qualifier.
8. Set Up Round-Robin Scheduling for Team Distribution (Teams Tier)
If you manage a sales, recruiting, or support team, round-robin scheduling ensures even distribution of inbound meetings without manual assignment. Our best CRM software roundup covers tools that pair well with round-robin lead distribution.
How to create a round-robin event (Teams plan required):
- Click “Create” → “Round-robin”
- Add team members who should receive bookings
- Choose distribution: Equal distribution, or prioritize by availability
- Set max events per person (prevents burnout)
Advanced customization:
- Priority ranking: Senior reps get first shot at high-value leads
- Availability pooling: System only offers times when at least one team member is free
- Buffer inheritance: Each team member’s personal buffer settings apply
Sales teams use round-robin for demo requests. Before Calendly, sales managers spent 2-3 hours per week manually routing leads based on rep availability and quota. Now it’s automatic, and lead response time improves by 40% (from average 4.2 hours to 2.5 hours).
9. Enable AI-Powered Routing for Complex Leads (Teams Tier)
This is where Calendly gets scary good. AI-powered routing (Teams tier, launched Q1 2026) analyzes form responses and automatically assigns meetings to the best-fit team member based on criteria you define.
How to set up AI routing:
- Create a routing form (covered in tip #13)
- Under routing logic, select “AI-powered routing”
- Define criteria: industry, company size, use case, budget, region
- AI learns from historical conversions to optimize over time
Example routing logic:
- Enterprise leads (>500 employees) → Senior Account Executive
- SMB leads (<50 employees) → Inside Sales Rep
- Technical questions → Solutions Engineer
- Pricing questions → Sales Manager
The AI considers team member expertise, current workload, and past conversion rates when assigning. After 30 days of learning, win rates on auto-routed leads increase by 14% compared to manual assignment. The system identifies that Solutions Engineers convert technical leads at 2.3x the rate of sales reps - so those leads route automatically.
10. Use Bi-Directional Google Calendar Sync (H1 2026 Feature)
Standard Calendly integration is one-way: Calendly creates events in your calendar, but if you add an event directly to Google Calendar, Calendly doesn’t know about it. The new bi-directional sync (rolled out March 2026) solves this.
How to enable bi-directional sync:
- Go to Account → Calendar Connections
- Find your Google Calendar connection
- Toggle “Enable bi-directional sync”
- Choose sync scope: All events, or only events with specific keywords
Why this matters:
- Add a personal appointment in Google Calendar → Calendly automatically blocks that time
- Move a Calendly booking in Google Calendar → Change reflects in Calendly
- Cancel an event in Google Calendar → Invitee receives cancellation notice from Calendly
This eliminates the biggest pain point: manually blocking personal appointments in Calendly by creating “Busy” events. Just add them to the calendar normally, and Calendly respects the conflict. The sync runs every 15 minutes, so changes propagate quickly.
Power User Calendly Tips (11-15): 2026 Features
11. Use Calendly Assist for Conversational AI Scheduling
Calendly Assist (beta launch October 2024, general availability March 2026) is a conversational AI that schedules meetings via natural language chat - no more sending booking links.
How it works:
- Enable Calendly Assist in Integrations → Calendly Assist
- Embed the chat widget on your website, or share a direct chat link
- Visitors describe their scheduling needs in plain English
- AI interprets availability preferences, checks your calendar, and confirms the booking
Example conversation:
- User: “I need a 30-minute strategy call next Tuesday afternoon”
- Calendly Assist: “I have 2pm, 3pm, or 4pm EST available on Tuesday, January 9. Which works best?”
- User: “2pm works”
- Calendly Assist: “Perfect! Strategy Call scheduled for Tuesday, January 9 at 2pm EST. A confirmation has been sent to your email.”
This is a significant shift for website visitors who find traditional booking pages intimidating or confusing. Conversion rates from “website visit to booked meeting” increase by 31% after implementing Calendly Assist on pricing pages. The AI handles timezone confusion, reschedule requests, and even multi-person scheduling (collective events) without human intervention.
Limitation: Currently available on Teams and Enterprise plans only.
12. Set Daily, Weekly, and Monthly Meeting Limits to Protect Your Time
Unlimited availability leads to burnout. Calendly lets you cap the number of bookings per day, week, or month - essential for maintaining work-life balance and preventing calendar overload.
How to set meeting limits:
- Open event type settings
- Under “When can people book this event?”
- Click “Invitee limits”
- Set maximum bookings per day (e.g., 4), per week (e.g., 15), or per month (e.g., 50)
Strategic use cases: Pair this with our focus time productivity tips for protecting deep-work blocks.
- Limit discovery calls to 3 per day so you still have time for deep work
- Cap sales demos at 12 per week to prevent quota-chasing burnout
- Restrict free consultations to 10 per month (forces prioritization)
Setting a daily limit of 5 meetings for all event types combined is a significant improvement. When the limit is hit, Calendly automatically stops offering same-day availability and pushes new bookings to the next available day. This single setting can reclaim 8 hours per week previously lost to “just one more quick call” hell.
Pro tip: Use different limits for different event types. For example, 5 “Quick Chats” per day but only 2 “Strategy Sessions” - the latter requires more energy and prep.
13. Create Routing Forms to Qualify Leads Before Booking
Routing forms (Teams tier) are multi-question intake forms that direct visitors to the right event type or team member based on their answers. This eliminates mismatched bookings and saves hours of unqualified calls.
How to create a routing form:
- Click “Create” → “Routing Form”
- Add qualifying questions (company size, budget, use case, etc.)
- Set routing logic: If answer = X, route to Event Type A; if answer = Y, route to Event Type B
Example routing logic for a SaaS company:
- Question 1: “What’s your company size?” (1-10, 11-50, 51-200, 201+)
- Question 2: “What’s your primary use case?” (Sales, Support, Marketing, Other)
- Routing: 201+ employees + Sales use case → Enterprise Sales Rep (60-min demo); 1-10 employees + Support use case → Support Specialist (30-min call)
Before routing forms, 40% of sales calls were misqualified (wrong team member or wrong event type). Now, that’s down to 8%. Adding a budget question that routes anyone selecting “under $1,000 annual budget” to a self-service signup page instead of booking a call saves reps hours on low-value leads.
14. Use Reconfirmation Workflows to Reduce No-Shows Further
No-show workflows (tip #4) react after someone misses a meeting. Reconfirmation workflows (Standard plan) prevent no-shows by requiring invitees to confirm attendance 24-48 hours before the scheduled time.
How to create a reconfirmation workflow:
- Navigate to Workflows → “Create Workflow” → “Reconfirmation”
- Set trigger: 24 hours before event
- Add action: “Send email requesting confirmation”
- Customize message: “Hi [Name], your [Event] is scheduled for [Time] tomorrow. Please confirm your attendance by clicking here: [Confirm Link]. If we don’t hear from you, we’ll assume you need to reschedule.”
Advanced option: Auto-cancel events if invitee doesn’t confirm within a specified window (e.g., 6 hours before meeting). This frees up the slot for someone else.
Pairing reconfirmation workflows with no-show workflows creates a two-layer defense:
- Layer 1: Reconfirmation request 24 hours before
- Layer 2: If they confirm but still no-show, trigger the no-show workflow from tip #4
Combined, these two workflows can reduce overall no-show rates from 18% to under 5% - a 72% improvement. For consultants, recruiters, and sales teams, this translates directly to recovered revenue.
15. Integrate with CRM (HubSpot, Salesforce) for Automatic Logging
Manual data entry is the silent killer of sales productivity. Calendly’s native CRM integrations (Standard plan) automatically log bookings, attendees, and outcomes to your CRM without lifting a finger.
How to connect Calendly to HubSpot or Salesforce:
- Go to Integrations → HubSpot (or Salesforce)
- Authenticate your CRM account
- Map Calendly event types to CRM objects (e.g., “Demo Call” creates a “Meeting” activity in HubSpot)
- Choose data sync: Contact info, event notes, attendance status
What gets auto-logged:
- Contact creation/update (name, email, phone)
- Activity/task creation (meeting scheduled, meeting completed)
- Custom fields from your routing form (budget, use case, company size)
- No-show tracking (marks activity as “No-show” in CRM)
Sales teams save an estimated 45 minutes per day per rep on CRM data entry - that’s 3.75 hours per week, or 195 hours per year per rep. With 6 reps, that’s 1,170 hours saved annually, equivalent to adding an extra half-time sales rep without the headcount cost.
Advanced integrations: Calendly also connects with Zapier (5,000+ apps), Slack (instant notifications), and Microsoft Teams (automatic meeting creation). If HubSpot and Salesforce don’t fit your stack, Zapier can bridge Calendly to virtually any tool. Our Zapier setup guide covers building these multi-step automations. Our best AI automation tools roundup covers more platforms that pair well with Calendly for end-to-end workflow automation.
Tier Recommendations: Which Plan is Right for You?
After covering 15 tips spanning all four Calendly pricing tiers, here’s a recommendation based on use case:
Free Tier: Only suitable for ultra-casual users or testing Calendly. You’re limited to 1 event type and 1 calendar connection, which is too restrictive for professional use.
Standard ($12/month): The sweet spot for 90% of users. Unlocks unlimited event types, workflows, payment collection, and 250 SMS credits per month. If you’re a consultant, freelancer, or small business owner, start here.
Teams ($20/month): Necessary for teams of 3+ people who need round-robin scheduling, AI-powered routing, or advanced lead management. Also required for Calendly Assist (conversational AI scheduling).
Enterprise (custom pricing): Only worthwhile for organizations with 50+ seats who need SSO, SCIM provisioning, or enterprise-grade compliance features. Pricing starts around $15,000/year, so it’s a significant investment.
Recommended setup: The Teams plan ($20/month) is the sweet spot, primarily for Calendly Assist and routing forms. The AI-powered routing and conversational scheduling typically increase meeting conversion rates enough to justify the cost within the first month.
Final Thoughts on Calendly Tips and Tricks
Calendly tips and tricks aren’t just about adding more features - they’re about reclaiming time and reducing the mental overhead of scheduling. The 15 strategies outlined here can collectively save 4-6 hours per week while cutting no-shows in half and improving meeting quality through better qualification.
The biggest mistake users make is treating Calendly as a static booking link. The real power unlocks when you layer workflows, routing logic, and AI-powered features to create a scheduling system that works for you, not the other way around.
Start with tips #1, #4, and #5 (buffer time, no-show workflows, multiple calendars) - these deliver immediate ROI with minimal setup. Then graduate to advanced features like routing forms (#13), reconfirmation workflows (#14), and Calendly Assist (#11) as your scheduling volume grows.
The 2026 updates to Calendly - particularly AI routing and bi-directional sync - have transformed it from a “nice to have” to an essential productivity tool. If you are comparing Calendly against newer entrants, our AI scheduling assistants roundup covers the full landscape. If you haven’t revisited your Calendly setup in the past 12 months, you’re likely missing features that could save you hours every week.
Frequently Asked Questions
What are secret events on Calendly and when should you use them?
Secret events are event types that do not appear on your main Calendly booking page but can be shared via direct link. They are useful for board member scheduling, media interviews, premium consultation slots, or beta tester access where you want different availability rules without confusing public visitors. To create one, edit any event type and toggle the Secret event option under advanced settings.
Is there a better option than Calendly?
For most solo consultants and small teams, Calendly remains the easiest scheduling tool to set up and share. Alternatives like SavvyCal, Cal.com (open source), and Microsoft Bookings can be a better fit if you need deep customization, self-hosting, or tight Microsoft 365 integration. For a feature-by-feature comparison, see our AI scheduling assistants roundup.
How can I make money with Calendly?
Calendly’s payment collection (Standard plan and above) lets you charge for consultations through Stripe or PayPal before a booking is confirmed. Common models include charging a refundable deposit to filter tire-kickers, taking full payment upfront for paid strategy sessions, or offering tiered pricing for 30, 60, and 90-minute slots on the same booking page. This pairs well with no-show workflows to keep paid calendars predictable.
What is Calendly and what does it do?
Calendly is a scheduling automation platform that eliminates the back-and-forth of meeting coordination. It offers customizable availability, calendar integrations, video conferencing, team routing, payment collection, and AI-powered scheduling features, making it a go-to solution for solo consultants and enterprise sales teams alike.
How much does Calendly cost in 2026?
Calendly has four tiers as of December 2026: a Free plan with 1 event type, Standard at $12/month with unlimited event types and workflows, Teams at $20/month adding round-robin and AI routing, and Enterprise with custom pricing starting around $15,000/year.
Want to learn more about Calendly?
Related Guides
- Schedule Smarter with AI - AI-driven scheduling workflows
- Reclaim AI Setup Guide - Time-blocking automation with Reclaim
- Motion AI Calendar Setup - AI calendar autopilot setup
Related Reads
Tools covered in this article:
More scheduling guides:
- Best AI Calendar Apps 2026 - Calendar tools compared
- Calendar Blocking Techniques - Deep work scheduling
External Resources
For official Calendly documentation and updates:
- Calendly Blog - Product updates, scheduling tips, and workflow automation guides
- Calendly Help Center - Feature tutorials and integration documentation
Ready to implement these Calendly tips and tricks? Start with a free Calendly account and upgrade to Standard when you need workflows and payment collection. Your future self will thank you for the time savings.
Related Guides
- ActiveCampaign AI Features: Active Intelligence Guide
- ActiveCampaign CRM Setup: How to Set Up ActiveCampaign CRM
- ActiveCampaign Email Automation: 10 Workflows That Work
- ActiveCampaign Lead Scoring: Complete Setup Guide (2026)
- ActiveCampaign Shopify Integration: Complete Setup
- ActiveCampaign WordPress: Forms, Tracking & Automation
- ActiveCampaign Zapier: 10 Automations to Build Today
- AI Agent Orchestration: Patterns That Scale in 2026
- AI Avatar Video Marketing: 2026 Walkthrough for Teams
- AI Chatbots Customer Service Setup: Complete 2026 Guide