




ActiveCampaign CRM setup is the process of configuring the built-in CRM available from the Plus plan ($49/month) to manage deal pipelines, contact scoring, and sales automation - all within ActiveCampaign itself, requiring no separate tool. The full setup, covering contacts, pipelines, and automations, takes approximately 30 minutes to complete.
Most businesses sign up for ActiveCampaign because of its email marketing and automation features - and Active Campaign continues to expand those capabilities with tools like the segment builder for precise audience targeting. What many teams overlook is that ActiveCampaign includes a fully featured CRM built directly into the platform - no separate tool required, no third-party integration to maintain. If you are already paying for a Plus plan or above, you have access to deal pipelines, contact scoring, sales automation, and team management features that rival standalone CRM tools costing two to three times as much.
The problem is that most teams never set it up. They keep tracking deals in spreadsheets - some even attempt to make your own CRM with Excel - or pay for a separate CRM while their ActiveCampaign account sits there with half its capabilities unused. This guide walks you through the complete activecampaign crm setup process in about 30 minutes - from importing your contacts and building your first sales pipeline to configuring lead scoring and connecting the automations that keep your pipeline moving without manual babysitting.
This guide is designed for sales managers, small business owners, and teams currently tracking deals in spreadsheets or a basic CRM. If you have been considering a CRM upgrade or want to consolidate your sales and marketing tools into one platform, this is your starting point. ActiveCampaign CRM features are available from the Plus plan at $49/month ($39/month annual), with a 14-day free trial to test everything before committing.
ActiveCampaign CRM Setup Prerequisites: Choosing the Right Plan
ActiveCampaign CRM Setup walks through the complete process from initial configuration to advanced usage. Whether you are starting fresh or optimizing an existing setup, this walkthrough covers every decision point, common pitfall, and the settings that make the biggest difference.
Before starting your activecampaign crm setup, you need to confirm you are on the right plan. ActiveCampaign offers four pricing tiers, and not all of them include CRM functionality.
The four plans:
Pricing verified April 2026 from ActiveCampaign's pricing page:
- Starter: $12/user/mo annual ($15 monthly)
- Email marketing
- Marketing automation
- Inline forms
- Plus: $39/user/mo annual ($49 monthly)
- Everything in Starter
- CRM with sales automation
- Landing pages
- Best for: CRM functionality with deal pipelines and contact scoring
- Professional: $119/user/mo annual ($149 monthly)
- Everything in Plus
- Predictive sending
- Split automations
- Enterprise: Contact sales
- Everything in Professional
- Custom reporting
- Dedicated account rep
ActiveCampaign holds across major review platforms, with users consistently highlighting the value of getting both email marketing and CRM in one tool.
For most sales teams starting out, the Plus plan gives you everything you need. You can always upgrade to Professional later when you want predictive features and advanced reporting - covered in our ActiveCampaign AI features guide. ActiveCampaign offers a 14-day free trial with full access to all features, so you can test the activecampaign crm setup before committing. The official Sales CRM platform page documents the full feature list.
What to have ready before you start:
- A contact list in CSV format (name, email, company, phone at minimum)
- A rough idea of your sales stages (how deals move from first contact to closed)
- Login credentials for any tools you want to integrate (calendar, email, Slack)
- Your team member email addresses if you are setting up multi-user access

Step 1: Importing and Organizing Your Contacts
The foundation of any CRM is your contact data. ActiveCampaign makes it straightforward to import contacts from a CSV file, another CRM, or manually. Getting this step right saves you hours of cleanup later.
Importing from CSV:
Navigate to Contacts > Import and upload your CSV file. ActiveCampaign will display a field mapping screen where you match your spreadsheet columns to ActiveCampaign contact fields. The essential fields to map are:
- First Name and Last Name - Used in personalization across emails and deal records
- Email - The primary identifier for every contact
- Company/Organization - Critical for B2B sales teams tracking account-level deals
- Phone - Direct line for sales follow-up
- Deal Value - If your CSV includes estimated deal sizes, map this now rather than adding it manually later
Organizing with tags and lists:
Tags are the most flexible way to segment your contacts for sales purposes. Create a tagging structure before you import so contacts are organized from the start. A recommended starting structure includes:
| Field | Value |
|---|---|
| Source tags | source:website, source:referral, source:trade-show, source:cold-outreach |
| Status tags | status:lead, status:qualified, status:customer, status:churned |
| Segment tags | segment:enterprise, segment:mid-market, segment:smb |
You can apply tags during the import process itself. On the import screen, use the “Add a tag” option to tag the entire batch. If your CSV contains a column with tag values, you can map that column to the tags field for granular tagging. For more advanced audience grouping techniques, see our ActiveCampaign segmentation strategies guide.
Custom contact fields for sales:
Standard fields cover the basics, but sales teams need more context. Navigate to Settings > Fields and create custom fields for data points your team uses to qualify deals: company size (dropdown), industry (dropdown), lead source (dropdown), annual revenue (currency), and decision timeline (date). Creating these fields before your import means you can map CSV columns directly to them, avoiding a manual data entry phase later.
Step 2: Creating Your Sales Pipeline
The pipeline is the visual backbone of your activecampaign crm setup. It represents your sales process as a series of stages, with deals moving from left to right as they progress toward closing.
Setting up your first pipeline:
Navigate to Deals > Pipelines in the left sidebar. Click Add Pipeline and give it a descriptive name like “New Business Pipeline” or “Inbound Sales.” ActiveCampaign creates a default pipeline with basic stages, but you should customize these to match your actual sales process.
Recommended pipeline stages for a standard B2B sales process:
- Lead In - New leads that have entered the pipeline but have not been contacted yet
- Contacted - Initial outreach has been made (email, call, or meeting scheduled)
- Qualified - The lead has been qualified against your criteria (budget, authority, need, timeline)
- Proposal Sent - A formal proposal, quote, or SOW has been delivered
- Negotiation - Active discussions on terms, pricing, or scope
- Won - Deal closed successfully
- Lost - Deal did not close (always track this for pipeline analytics)
To customize stages, click the gear icon next to any stage name. You can rename stages, reorder them by dragging, change stage colors for visual clarity, and delete stages you do not need. A critical rule of thumb: keep your pipeline under seven stages. More than that and deals get stuck in intermediate stages that do not represent meaningful progress.
Multiple pipelines for different sales motions:
If your business has distinct sales processes, create separate pipelines rather than cramming everything into one. Common configurations include:
- New Business vs Upsell/Expansion - Different stages and velocity expectations
- Inbound vs Outbound - Inbound deals skip the cold outreach stages
- Product A vs Product B - When products have fundamentally different sales cycles
Each pipeline gets its own analytics, so you can track conversion rates and velocity independently. Our deal pipeline guide goes deeper on multi-pipeline strategy.
Step 3: Configuring Custom Deal Fields
Contact fields store information about people. Deal fields store information about specific opportunities. Configuring the right deal fields early means your team captures consistent data on every deal, which makes forecasting and pipeline analysis possible.
Why custom fields matter:
Without custom deal fields, sales reps default to putting everything in the notes section. Notes are unsearchable, unstructured, and impossible to report on. Custom fields turn anecdotal information into structured data that you can filter, sort, and analyze across your entire pipeline.
Recommended custom deal fields:
Navigate to Settings > Deals > Custom Fields and create these fields:
- Deal Source (dropdown) - Where this opportunity originated: inbound, referral, cold outreach, partner, event. Critical for understanding which channels produce the highest-value deals
- Expected Close Date (date) - When you realistically expect to close. This drives pipeline forecasting and helps identify deals that are slipping
- Competitor (dropdown or text) - Which alternative the prospect is evaluating. Knowing your competition on each deal lets you tailor your pitch
- Decision Maker (text) - Name and title of the person with final approval authority. Deals stall when you are selling to someone who cannot say yes
- Budget Range (dropdown) - Ranges like $0-5K, $5K-25K, $25K-100K, $100K+. Dropdown ranges prevent the inconsistency of free-text entries
- Next Step (text) - The specific next action required to advance this deal. Forces reps to think about forward momentum
Field types available in ActiveCampaign:
The CRM help center documents every field type. ActiveCampaign supports text, textarea, number, currency, date, dropdown, checkbox, and radio button field types. For any field where you want consistent reporting, use a dropdown or checkbox rather than free text. Free text fields are useful for context (like “Next Step”) but impossible to aggregate for pipeline reporting.
Step 4: Adding Your First Deals
With your pipeline stages and custom fields configured, it is time to populate the pipeline with actual deals. ActiveCampaign gives you three ways to add deals.
Manual deal creation:
Click the + button in any pipeline stage to create a deal. Fill in the deal title (typically the company name or project name), assign it to a contact, set the deal value, and populate your custom fields. Assign the deal to a team member using the owner dropdown. This method works well for high-touch deals where a rep has already had a conversation.
Importing deals from CSV:
If you are migrating from another CRM or a spreadsheet, navigate to Deals > Import and upload a CSV. Map your columns to deal fields the same way you did for contacts. Make sure your CSV includes the contact email so ActiveCampaign can link each deal to the right contact record. Deals without a linked contact are orphans that create reporting gaps.
Auto-creating deals from form submissions:
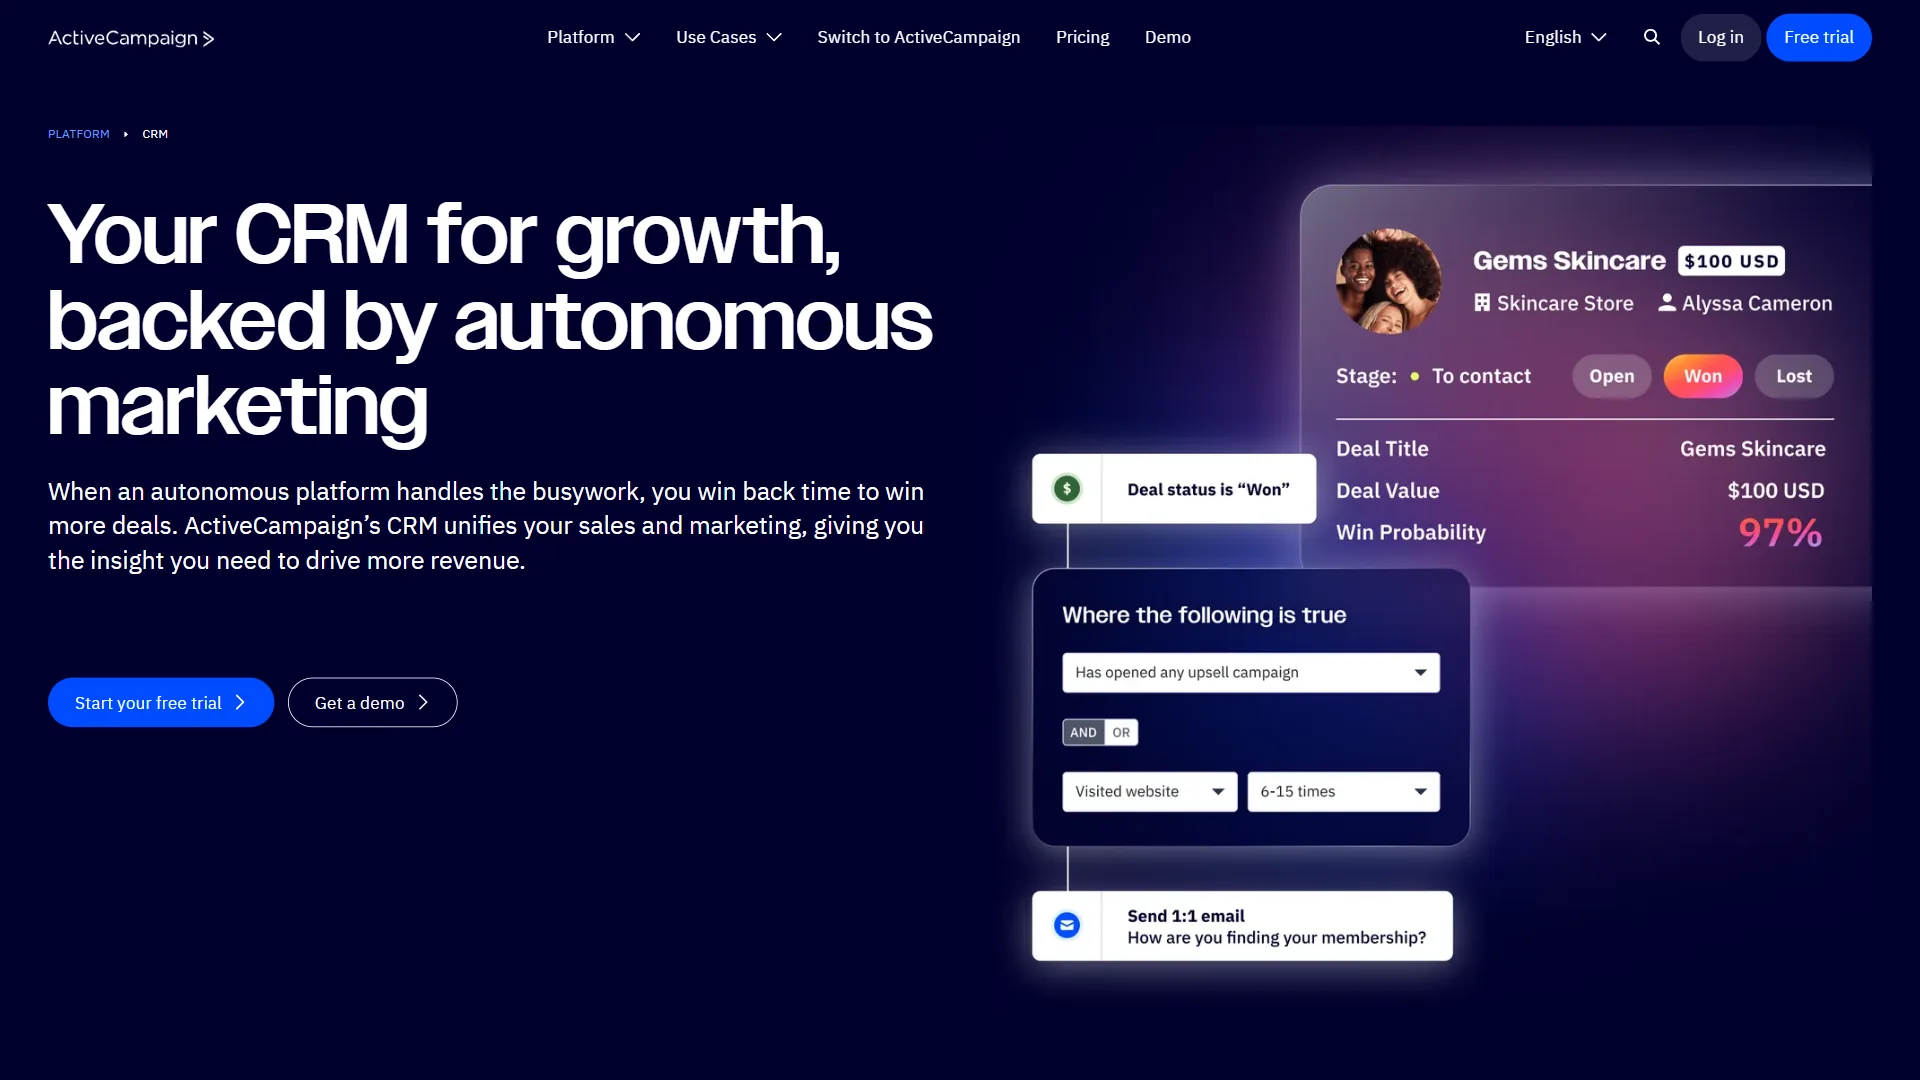
This is where ActiveCampaign CRM starts to show its advantage over standalone CRM tools. You can build an automation that creates a deal automatically whenever someone submits a specific form - a demo request, plan inquiry, or consultation booking. Navigate to Automations > Create Automation and select “Submits a form” as the trigger. Add a “Create a Deal” action, set the pipeline and stage, and map form fields to deal fields. Every inbound inquiry automatically becomes a tracked deal without a rep lifting a finger.
Assigning deals to team members:
If you have multiple sales reps, the getting started guide covers how to invite team members before you set up deal assignment rules. You can assign deals round-robin (each new deal goes to the next rep in rotation), by territory (based on contact location or company size), or by deal source (inbound deals to one team, outbound to another). Navigate to Deals > Settings to configure automatic assignment, or set the owner manually when creating deals.
Step 5: Setting Up Lead Scoring
Lead scoring is what separates a CRM that tracks deals from a CRM that helps you close them. By assigning point values to contact behaviors and attributes, you create a system that automatically surfaces your hottest leads and flags contacts that are going cold.
Contact scoring vs deal scoring:
ActiveCampaign supports two types of scores. Contact scores measure how engaged and qualified an individual contact is based on their interactions with your emails, website, and forms. Deal scores measure the health and likelihood of closing a specific deal. Both are valuable, but contact scoring is where you should start - it feeds directly into your pipeline by identifying which contacts are ready for a sales conversation.
Building your scoring model:
Navigate to Contacts > Scoring and create a new score. Here is a recommended starting model with point values that balance engagement signals with qualification criteria:
- Visited pricing page: +10 points (strong buying intent signal)
- Opened 3 or more emails: +5 points (consistent engagement)
- Job title matches your ICP: +20 points (qualification fit)
- Downloaded whitepaper or resource: +15 points (active research phase)
- Submitted a contact form: +25 points (direct sales intent)
- Company size matches target segment: +15 points (qualification fit)
- No email opens in 30 days: -10 points (disengagement signal)
- Unsubscribed from a list: -25 points (strong negative signal)
Setting thresholds for sales handoff:
A scoring model without thresholds is just a number. Define what the scores mean for your sales process:
- 0-25 points: Cold lead - stays in marketing nurture sequences
- 26-50 points: Marketing Qualified Lead (MQL) - gets added to targeted campaigns
- 51-75 points: Sales Qualified Lead (SQL) - assigned to a rep for outreach
- 76+ points: Hot lead - immediate follow-up required within 24 hours
Our ActiveCampaign lead scoring guide covers advanced scoring models including predictive elements and behavioral weighting. You can automate these transitions. Create an automation triggered by “Contact score changes” with a condition checking whether the score exceeds your SQL threshold. When it does, the automation creates a deal in your pipeline, assigns it to a rep, and sends a notification. This eliminates the manual MQL-to-SQL handoff that causes leads to fall through the cracks.
Step 6: Building Sales Automation Workflows
Sales automation is where ActiveCampaign CRM delivers its biggest advantage over standalone CRM tools. Because the CRM is built into the same platform as the automation engine, you can create workflows that span both marketing and sales activities without any integration headaches.
The full marketing automation platform sits underneath every example below.
Key automation 1: Auto-create deals from lead score threshold
This is the most important automation to build first. Navigate to Automations > Create Automation and set the trigger to “Contact score changes.” Add a condition: “If contact score is greater than 50.” Then add these actions in sequence: create a deal in your primary pipeline (set to the “Lead In” stage), assign the deal owner based on your assignment rules, and send an internal notification to the assigned rep. This automation ensures every qualified lead becomes a tracked deal without anyone checking scores manually.
Key automation 2: Follow-up reminders when deals stall
Deals that sit in a stage too long are dying. Create an automation triggered by “Deal stage changes” that starts a timer. If the deal has not moved to the next stage within your expected timeframe (for example, 5 days in the “Proposal Sent” stage), the automation sends a task reminder to the deal owner and optionally notifies their manager. This keeps your pipeline moving and prevents deals from silently going cold.
Key automation 3: Stage-based email sequences
When a deal moves to a specific stage, trigger an email sequence tailored to that stage. For example, when a deal moves to “Proposal Sent,” automatically send the contact a follow-up email with case studies relevant to their industry. When a deal moves to “Negotiation,” send a comparison sheet addressing common objections. These sequences run automatically, giving your reps air support without requiring them to remember to send follow-up content.
Key automation 4: Win/loss tagging and feedback
For more advanced patterns combining conditional logic with deal-stage triggers, see our conditional content guide. When a deal moves to “Won,” trigger an automation that tags the contact as customer, updates their contact score, adds them to a customer onboarding sequence, and notifies the customer success team. When a deal moves to “Lost,” trigger a separate automation that tags the contact with the loss reason (captured via a custom deal field), adds them to a re-engagement nurture campaign, and sends an internal summary to the sales manager for pipeline review.

Step 7: Connecting Integrations
A CRM works best when it is connected to the other tools your sales team uses daily. ActiveCampaign offers over 950 native integrations through its Apps marketplace, plus Zapier connectivity for tools without a direct integration.
Top 5 sales integrations to connect first:
-
Calendly - Sync meeting bookings directly to contact records and automatically create deals when prospects book a sales call. Navigate to Settings > Integrations > Calendly and authenticate your account. Every booking creates an activity on the contact timeline and can trigger an automation
-
Slack - Get real-time deal notifications in your team’s Slack channels. Set up alerts for new deals created, deals moving to key stages (like “Proposal Sent” or “Won”), and deals that have stalled. This keeps the whole team aware of pipeline movement without logging into the CRM
-
Google Workspace - Enable two-way email sync so that emails sent from Gmail appear on the contact timeline in ActiveCampaign. This gives every team member visibility into what has been communicated without forwarding emails or copying notes
-
Stripe - Connect payment processing to automatically update deal stages when payments are received. When a prospect pays an invoice, the deal moves to “Won” automatically, the contact gets tagged as a customer, and onboarding automations kick in
-
Zoom - Log meeting recordings and attendance on contact records. When combined with Calendly, you get a complete record of every meeting - when it was booked, who attended, and the recording link for reference
Connecting integrations:
Navigate to Settings > Integrations or search the Apps marketplace from the left sidebar. Most integrations require OAuth authentication (click Connect, log in to the other tool, authorize access). Some integrations like Stripe require an API key, which you can find in the other tool’s settings.
For tools without a native ActiveCampaign integration, Zapier bridges the gap. Our ActiveCampaign Zapier automations guide walks through the most useful recipes. Common Zapier connections for sales teams include syncing ActiveCampaign deals to accounting software, creating Asana tasks from deal stage changes, and logging CRM activities to a shared Google Sheet for custom reporting.
Common Mistakes to Avoid
After helping teams set up their activecampaign crm setup, these are the mistakes that cause the most friction. Avoiding them during initial setup saves significant rework later.
Creating too many pipeline stages. Your pipeline should reflect major milestones, not every minor interaction. A deal does not need a stage for “sent intro email,” “they replied,” “scheduled call,” and “had call” - those are activities, not stages. Keep your pipeline under seven stages. If you find yourself with more, combine stages that do not represent a meaningful change in deal probability.
Skipping custom fields and relying on notes. Notes feel faster in the moment, but they create a reporting black hole. When your sales manager asks “how many deals did we lose to Competitor X this quarter,” notes cannot answer that question. Custom fields with dropdowns can. Invest the 15 minutes to set up proper fields before your team starts entering data.
Not setting up lead scoring before going live. If your team starts creating deals manually without a scoring model, you lose the ability to compare manual assessment against behavioral data. Set up even a basic scoring model before launch so you have data from day one. ActiveCampaign’s sales CRM platform page includes a quick-start checklist for scoring configuration.
Importing dirty data without deduplication. Duplicate contacts create duplicate deals, inflated pipeline values, and confused reps who do not know which record is current. Before importing, deduplicate your CSV by email address. ActiveCampaign handles duplicates by merging on email, but the merge can overwrite fields unpredictably if your duplicates have conflicting data.
Over-automating before understanding your sales process. Automation amplifies whatever process you feed it - including a broken one. Run your pipeline manually for two to four weeks before building complex automations. Watch where deals actually stall, which emails reps send repeatedly, and which handoffs get dropped. Then automate those specific pain points rather than guessing.
Not configuring deal notifications for the team. Reps who do not get notified about new deals, stage changes, or stalled opportunities will stop checking the CRM. Set up email or Slack notifications for the events that matter most: new deal assigned, deal idle for X days, and deal moved to “Won” or “Lost.” Notifications keep the CRM relevant to daily workflow instead of becoming a system reps update grudgingly.
Next Steps
With your ActiveCampaign CRM configured, your sales pipeline is ready for action. But the initial setup is just the starting point. Here is where to go from here to get the most out of the platform.
Build advanced automations. This guide covered the foundational automations, but ActiveCampaign’s workflow builder supports far more sophisticated sequences. Our ActiveCampaign automation builder guide walks through advanced patterns including multi-branch workflows, conditional splits based on deal data, and goal-based automations that measure conversion at each stage.
Optimize your email workflows. Your CRM deals and your email marketing should work as a unified system. Our ActiveCampaign email automation workflows guide covers the 10 highest-ROI email sequences you can connect to your pipeline - from lead nurture drips triggered by deal stage to win-back campaigns for lost deals.
Go deeper on deal pipelines. As your team gains experience with the CRM, you will likely want to refine your pipeline stages, create additional pipelines for different sales motions, and build custom deal views filtered by owner, value, or expected close date. Future guides will cover advanced pipeline management and multi-pipeline strategy.
Implement advanced lead scoring. The basic scoring model in this guide works well for getting started, but advanced scoring incorporates predictive elements, website behavior tracking, and machine learning (available on the Professional plan) - see our predictive sending AI guide for the underlying ML. More sophisticated scoring models will be covered in upcoming guides on lead qualification and scoring optimization.
Want to learn more about ActiveCampaign?
Frequently Asked Questions
Does ActiveCampaign have a built-in CRM, or do I need a separate tool?
Yes, ActiveCampaign includes a fully built-in CRM with deal pipelines, contact management, lead scoring, and sales automation. It is not a bolt-on or integration - the CRM is part of the core platform and shares the same contact database as the email marketing features. This means every email interaction, form submission, and website visit automatically appears on contact records your sales team uses. You do not need a separate CRM tool if you are on the Plus plan or above.
Which ActiveCampaign plan do I need for CRM features?
CRM and deals features require the Plus plan at minimum, shown in the live ActiveCampaign pricing table above. The Starter plan includes email marketing and basic automation but does not include deal pipelines, contact scoring, or sales automation. The Professional plan adds predictive features like win probability scoring and predictive sending. All plans include a 14-day free trial with full feature access.
How do I create a sales pipeline in ActiveCampaign?
Navigate to Deals in the left sidebar, then click Pipelines and select Add Pipeline. Name your pipeline, then customize the stages by clicking the gear icon next to each stage name. You can rename stages, reorder them by dragging, add new stages, and delete stages you do not need. Most sales teams start with five to seven stages: Lead In, Contacted, Qualified, Proposal Sent, Negotiation, Won, and Lost.
Can I import my contacts from another CRM into ActiveCampaign?
Yes. ActiveCampaign supports CSV import with custom field mapping, which means you can export from virtually any CRM (HubSpot, Salesforce, Pipedrive, Zoho, or even a spreadsheet) and import directly. Navigate to Contacts > Import, upload your CSV, and map each column to the corresponding ActiveCampaign field. ActiveCampaign also offers direct migration assistance from select platforms and has migration guides for the most common CRM tools.
How does ActiveCampaign CRM compare to HubSpot or Pipedrive?
ActiveCampaign is the strongest choice when you want email marketing and CRM in a single platform without paying enterprise prices. Our best CRM tools for small business 2026 roundup covers the full landscape if you are still evaluating options. HubSpot offers a free CRM tier but charges significantly more for marketing automation features comparable to what ActiveCampaign includes at the Plus level - HubSpot Marketing Hub Professional is $801/month annual on annual billing. Pipedrive is a pure sales CRM with excellent pipeline visualization but lacks built-in email marketing, meaning you need a separate tool for campaigns and automation sequences. If your priority is combining sales pipeline management with sophisticated email automation, ActiveCampaign provides the best value at the Plus and Professional tiers.
How long does it take to set up ActiveCampaign CRM?
The basic activecampaign crm setup covered in this guide takes approximately 30 minutes: importing contacts, creating a pipeline, configuring custom fields, and adding your first deals. Allow an additional one to two hours if you want to set up lead scoring rules, build your first sales automations, and connect integrations like Calendly, Slack, and Google Workspace. Most teams have a fully functional CRM running within a single afternoon. The key is starting with the basics and layering in automation over the following weeks as you identify which manual tasks are worth automating.
Related Guides
- ActiveCampaign Deals: Pipeline Setup and Automation
- ActiveCampaign Automation Builder Guide
- ActiveCampaign Getting Started Guide
- ActiveCampaign Lead Scoring Guide
- ActiveCampaign Email Automation Workflows
Related Reading
External Resources
- ActiveCampaign Sales CRM - Official overview of CRM features including pipelines, deal scoring, and sales automation
- ActiveCampaign CRM Help Center - Setup and configuration documentation
- ActiveCampaign Blog - CRM and sales automation case studies and tutorials
Related Guides
- 15 Calendly Tips and Tricks to Save 4+ Hours Weekly
- Activecampaign AI Content Generation: Complete 2026 Guide
- ActiveCampaign AI Features: Active Intelligence Guide
- Activecampaign Automation Builder: Complete 2026 Guide
- Activecampaign Brand Kit: 2026 Walkthrough for Teams
- ActiveCampaign Conditional Content: Personalization Guide
- ActiveCampaign Deals Pipeline: Stages & Automation
- ActiveCampaign Deliverability: Best Practices Guide
- ActiveCampaign Email Automation: 10 Workflows That Work
- ActiveCampaign Email Campaign Setup: Step-by-Step Guide