


ElevenLabs YouTube voiceover is a workflow that replaces traditional recording sessions with AI-generated narration, turning a finished script into a production-ready audio track in under 30 minutes. It removes friction from the process, delivers consistent audio quality, and lets creators iterate on scripts without re-recording - making it practical for tutorials, explainers, and faceless channels.
If you have ever spent an afternoon recording voiceovers for a YouTube video - re-reading paragraphs because of background noise, stumbling over a sentence, or fighting mic plosives - you already understand why creators are switching to voice over AI for narration. An ElevenLabs YouTube voiceover workflow replaces that entire recording session with a process that takes minutes instead of hours, produces consistent audio quality every time, and lets you iterate on your script without re-recording a single word.
This is not about replacing human personality in your videos. It is about removing the friction between having a finished script and having a finished voiceover track ready to drop into your timeline. Whether you run a faceless YouTube channel, produce educational content, build product walkthroughs, or simply want a professional-sounding narration layer for your video essays, ElevenLabs AI gives you a production-quality voice pipeline that fits directly into your existing editing workflow.
This guide walks through the complete process from script preparation to final upload. You will learn how to write scripts that sound natural when spoken by AI, select and test voices for your channel brand, generate audio in sections for easier editing, sync everything in your video editor, and export with the right settings for YouTube. By the end, you will have a repeatable workflow you can use for every video you publish. If you are brand new to ElevenLabs, the Getting Started with ElevenLabs guide covers account setup and Studio basics first. The official YouTube Help guide on monetization is also worth skimming if you plan to monetize voiceover-led videos.
ElevenLabs YouTube Voiceover: The Scenario
This ElevenLabs YouTube voiceover workflow replaces a full afternoon of recording with about 30 minutes of generation, sync, and polish inside the ElevenLabs Voiceover Studio. The next sections cover script prep, voice testing, section-by-section generation, editor sync (Premiere, DaVinci, CapCut), polish, and YouTube-optimized export settings.
You have a YouTube video in progress. The footage is edited, the b-roll is cut, and your script is written. What you need now is a voiceover track that sounds professional, matches the tone of your channel, and syncs cleanly with your visuals. Instead of setting up a microphone, recording in a quiet room, and editing out every breath and stumble, you are going to generate the entire voiceover with ElevenLabs and have it timeline-ready in under 30 minutes.
The workflow you will build here works for any YouTube format - tutorials, listicles, product reviews, explainers, documentaries, and faceless channels. The steps are the same regardless of video length, though longer videos benefit from the section-by-section approach covered in Step 3.
Prerequisites
Before starting this ElevenLabs YouTube voiceover workflow, make sure you have the following ready.
An ElevenLabs account with a paid plan. The free tier gives you 10,000 characters per month - roughly 12 to 15 minutes of audio. That is enough for one short video, but most YouTube creators burn through it quickly during voice testing alone. The Starter plan at $5 per month includes 30,000 characters and a commercial license, which you need for monetized YouTube content. The Creator plan at $22 per month gives you 100,000 characters and professional voice cloning. Compare tiers on the pricing page.
A finished video script. Your script should be written, reviewed, and finalized before you generate any audio. Changing the script after generation means regenerating sections and burning through your character quota. Have the complete script in a text document or Google Doc ready to go.
A video editor. This workflow covers sync instructions for Adobe Premiere Pro, DaVinci Resolve, and CapCut. Any editor that accepts WAV or MP3 audio imports will work. You do not need any special plugins or integrations.
Basic audio awareness. You do not need to be an audio engineer, but you should know the difference between volume levels that are too quiet and too loud, and be comfortable adjusting audio tracks on a timeline. If you have ever edited a YouTube video with music, you have enough experience.
Workflow Overview
The complete ElevenLabs YouTube voiceover workflow follows six steps. Each builds on the previous one, and the entire process typically takes 20 to 40 minutes depending on video length.
- Script - Format and optimize your written script for AI speech generation
- Voice Test - Audition voices with sample lines from your actual script
- Generate - Produce the voiceover in sections using consistent settings
- Sync - Import audio into your video editor and align with visuals
- Polish - Layer background music, adjust volume, and add sound effects
- Upload - Export with YouTube-optimized audio settings
This is a linear workflow. Do not skip ahead to generation before testing voices, and do not start syncing before all your audio sections are generated. Each step saves time downstream by preventing rework.
Step 1: How Do You Write Scripts for AI Voiceover?
The biggest mistake YouTube creators make with AI voiceover is treating their script like a blog post. Written text and spoken text have different rhythms, and a script that reads well on screen can sound awkward when spoken aloud by any voice - human or AI.
Keep sentences between 10 and 25 words. Longer sentences cause AI voices to rush through the middle, losing the natural pacing that makes narration feel human. If a sentence exceeds 25 words, split it. Your viewers are listening, not reading, and shorter sentences give them time to process each idea.
Write your hook as a standalone paragraph. The first 5 to 10 seconds of your YouTube video determine whether viewers stay or leave. Write your opening hook as its own short paragraph - two or three punchy sentences that establish what the viewer will learn or see. This also becomes its own audio section in Step 3, making it easy to time against your visual hook.
Mark pauses explicitly. ElevenLabs responds to punctuation, but sometimes you need a longer pause than a period provides. Use an ellipsis (…) for a medium pause, and a line break between paragraphs for a full breath pause. For example, a reveal moment in a listicle might look like this in your script:
And the number one tool that changed everything…
That ellipsis creates a natural beat that builds anticipation. Without it, the AI voice rushes straight from “everything” into “Notion” and the moment falls flat.
Avoid abbreviations and acronyms on first use. Write “search engine optimization” the first time, then “SEO” afterward. AI voices handle acronyms reasonably well, but spelling out the term once establishes the context and sounds more professional in a narration.
Read your script out loud before generating. This is the single best quality check. If you stumble while reading it yourself, the AI voice will struggle too. Rewrite any sentence where you lose your breath or your pacing feels unnatural. The Hemingway Editor is a useful free tool for surfacing sentences that are too long or too dense for spoken delivery. For guidance on writing scripts that work well with AI voices, the AI Voiceover Tips guide covers pacing, emphasis, and natural delivery patterns.
Format section breaks clearly. Use blank lines or horizontal rules between script sections. Each section becomes a separate generation in Step 3, so clear formatting makes it easy to copy and paste individual segments into ElevenLabs without accidentally cutting a sentence in half. The ElevenLabs Pronunciation Dictionary Setup guide is worth bookmarking if your script has brand names or technical terms ElevenLabs will likely mispronounce.
Step 2: How Do You Choose the Right Voice?
Voice selection sets the tone for your entire channel. Viewers associate your narration voice with your brand, so choose carefully and stay consistent across videos.
Start with your content type. Different YouTube formats suit different vocal qualities:
- Tutorials and how-tos - Clear, measured, slightly warm. Voices like Adam or Daniel work well because they are easy to follow over long explanations.
- Product reviews - Conversational, confident, slightly energetic. You want a voice that sounds like it has an opinion without being aggressive.
- Documentaries and explainers - Authoritative, deep, steady pacing. Look for voices tagged with “narration” or “documentary” in the Voice Library.
- Listicles and top-ten videos - Upbeat, engaging, moderate pace. These formats benefit from voices with natural enthusiasm in their delivery.
- Faceless channels - This depends entirely on your niche. Finance channels tend toward authoritative male voices. Lifestyle and wellness channels often use warm, approachable female voices. Match the expectations of your audience.
Test with actual script lines, not sample text. Navigate to ElevenLabs and open the Text to Speech workspace. Paste three to four sentences from your actual script and generate them with your top two or three voice candidates. Generic preview samples do not tell you how a voice handles your specific vocabulary, sentence structure, and punctuation patterns. The ElevenLabs Voice Library Guide covers how to filter and shortlist voices efficiently.
Check consistency across paragraph lengths. Generate a short sentence, a medium paragraph, and a full script section with the same voice. Some voices drift in tone or pacing as text length increases. A voice that sounds great reading one sentence might become monotone over a full minute of narration.
Save your chosen voice. Once you find a voice that works, add it to your personal voice collection by clicking the bookmark icon. Use the same voice for every video on your channel. Switching voices between uploads confuses viewers and undermines brand consistency.
Consider voice cloning for personal channels. If you want the narration to sound like you but without recording, the ElevenLabs professional voice cloning feature (available on Creator plans and above) lets you upload samples of your real voice and generate AI speech that matches your vocal characteristics. See the ElevenLabs Voice Cloning Tutorial for a complete walkthrough. If you want to design a fictional character voice instead of cloning, the ElevenLabs Voice Design v3 Guide covers the prompt formula in depth.
Step 3: Generating the Voiceover
Do not paste your entire script into the text box and hit generate. Section-by-section generation gives you more control, produces better results, and makes the editing process significantly easier.
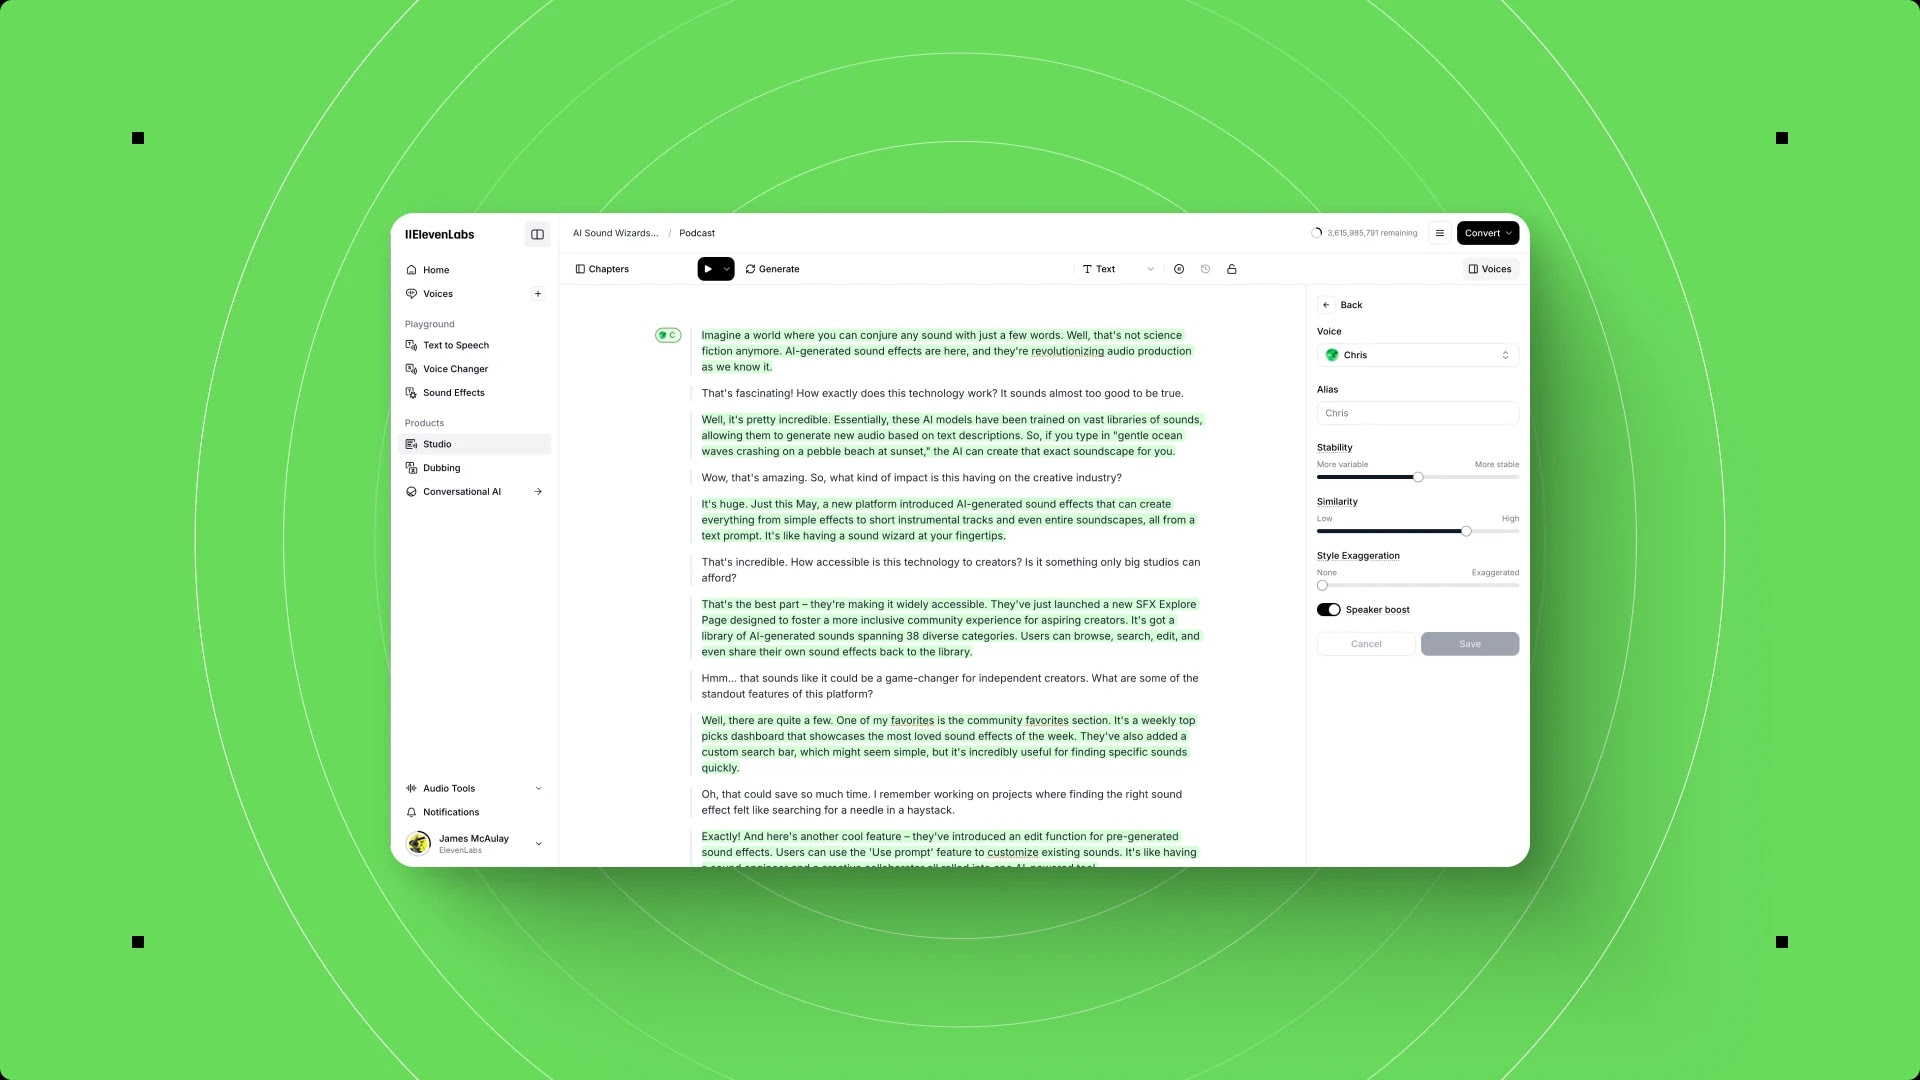
Break your script into logical sections. Each section should correspond to a topic or visual segment in your video. A typical 10-minute YouTube video might have 8 to 12 sections: hook, intro, main point 1, main point 2, main point 3, transition, example, counterpoint, summary, call to action. Each section becomes its own audio file.
Set your voice parameters before generating. In the ElevenLabs generation panel, configure these settings and keep them identical across all sections:
| Field | Value |
|---|---|
| Model | Use Eleven Multilingual v2 for the highest quality narration. Flash v2.5 is faster but slightly less natural - use it only if you are prototyping and plan to regenerate with Multilingual v2 later. |
| Stability | Set between 0.50 and 0.75 for YouTube voiceover. Lower values add more vocal variation and expressiveness; higher values produce more consistent, predictable output. A setting around 0.65 works well for most narration styles. |
| Similarity Enhancement | Keep between 0.70 and 0.85. This controls how closely the output matches the selected voice profile. Higher values produce a more faithful reproduction of the voice but can amplify artifacts if the source voice has any issues. |
Generate section by section. Paste your first script section into the text field, generate, and listen. If the pacing or emphasis sounds off, adjust the text slightly - add a comma for a micro-pause, rephrase an awkward transition, or break a long sentence into two shorter ones. Once you are satisfied, download the audio file and name it clearly: 01-hook.mp3, 02-intro.mp3, 03-main-point-1.mp3, and so on.
Do not regenerate excessively. Each generation consumes characters from your monthly quota. If a section sounds 90% right, move on and make minor timing adjustments in your video editor later. Perfectionism at the generation stage burns through quota quickly and rarely produces noticeably better results than small editorial fixes. The ElevenLabs Audio Quality Optimization guide covers stability and similarity tuning if you need finer control. If you need to clean up noisy reference audio before voice cloning, the ElevenLabs Voice Isolator Guide walks through the denoising workflow.
Use Projects for long-form content. If your script is over 3,000 characters, consider using the ElevenLabs Studio workspace instead of the basic Text to Speech tool. Studio lets you manage an entire script in one place, assign voice settings to blocks of text, and export all sections at once. The ElevenLabs Studio guide covers this in detail.
Step 4: Syncing Audio with Video
With all your audio sections generated and downloaded, open your video editor and import them. The sync process is straightforward, but a few practices make it significantly faster.
Create a dedicated audio track for voiceover. In Premiere Pro, DaVinci Resolve, or CapCut, add a new audio track specifically for your AI narration. Keep it separate from your music track and sound effects track. Label it “VO” or “Narration” so you can identify it instantly on the timeline.
Drop sections in sequence. Import all your numbered audio files and place them on the voiceover track in order. Do not worry about precise timing yet - just get them in the right sequence with small gaps between each section.
Align to visual markers. Scrub through your video and identify the visual transition points where each topic begins. Drag each voiceover section to align its start with the corresponding visual cue. For example, if your hook text should play over the opening shot, align 01-hook.mp3 with the first frame of that shot.
Premiere Pro
Select the voiceover clip on the timeline. Use the Razor Tool (C) to cut sections that need repositioning. Hold Shift while dragging to keep the clip locked to its track while moving it horizontally. Use J, K, L keys to shuttle through the timeline while listening, and press M to drop markers at points where voiceover and visuals need to sync more tightly. Adobe’s Premiere Pro audio guide is the canonical reference for keyboard shortcuts.
DaVinci Resolve
Switch to the Edit page. Drag your audio files from the Media Pool onto a dedicated audio track. Use the Blade tool (B) to split clips, and drag the edges of clips to trim silence from the beginning or end of each section. The Audio track inspector on the right lets you adjust individual clip volume without affecting the full track. The DaVinci Resolve manual covers the Fairlight page in detail if you want deeper audio control.
CapCut
Import your audio files and drag them to the audio timeline. CapCut automatically snaps clips to the playhead, which makes rough alignment fast. Use the split tool to cut sections, and drag clip edges to trim. CapCut is the simplest option for creators who want fast editing without deep audio controls.
Adjust gaps for pacing. After placing all sections, play through the entire video and listen for pacing issues. You will likely need to add short silences (0.5 to 1.5 seconds) between sections where the visual needs a beat before the next narration starts. In Premiere Pro, simply drag clips apart. In DaVinci Resolve, select and move clips along the track. These gaps are where your background music and sound effects do their work.
Step 5: Adding Polish
Raw voiceover on a silent timeline sounds flat. Polish turns a voiceover into a narration that feels produced.
Layer background music. Place your music track below the voiceover track. The music should sit at roughly 15% to 25% of the voiceover volume - present enough to fill silence but never competing with the narration. In Premiere Pro, use the Audio Track Mixer to set the music track level. In DaVinci Resolve, open the Fairlight page for precise volume control.
Use volume keyframes for dynamic mixing. At points where the voiceover pauses - between sections, during visual-only moments, or at dramatic beats - raise the music volume to 40% to 60%. Then bring it back down before the next narration section starts. This creates the natural “breathing” effect that professional YouTube videos have. Most editors let you add keyframes by clicking on the volume line in the audio clip and dragging it up or down.
Add sound effects at transition points. A subtle whoosh, click, or tonal hit at the start of a new section reinforces the visual transition and gives the viewer an audio cue that the topic is shifting. Keep effects subtle - they should support the voiceover, not distract from it. Free sound effect libraries like Pixabay and Freesound have thousands of options. The ElevenLabs Sound Effects Guide covers generating custom sound effects with AI when stock libraries fall short.
Normalize your voiceover level. If different generated sections have slightly different volumes - which can happen even with consistent settings - normalize them to a consistent level. In Premiere Pro, right-click the voiceover clips, select Audio Gain, and set Normalize All Peaks to -3 dB. In DaVinci Resolve, use the Normalize Audio Levels option in the Fairlight page. This ensures your narration sounds even from start to finish.
Check for clicks and artifacts. Listen through the complete voiceover at least once with headphones. AI-generated audio occasionally produces subtle clicks at sentence boundaries or slight tonal shifts between sections. Most are inaudible on speakers but noticeable on headphones. If you find an artifact, trim the clip edge slightly to cut it out, or apply a very short crossfade between adjacent clips to smooth the transition.
Step 6: Export and Upload
Your export settings determine whether YouTube processes your audio cleanly or introduces compression artifacts that degrade your narration quality.
Audio codec: Export with AAC audio at 320 kbps or higher. This is YouTube’s recommended audio codec and provides the best quality-to-file-size ratio. If your editor offers PCM or WAV audio in the export, that works too but produces larger files with no perceptible quality improvement after YouTube re-encodes.
Sample rate: 48 kHz. This is the standard for video production and matches YouTube’s internal processing. If your project is set to 44.1 kHz, it will work but YouTube will resample it, which can introduce very subtle artifacts.
Channel configuration: Stereo. Even though your voiceover is mono, export in stereo. YouTube handles stereo files more predictably than mono, and your background music is likely stereo anyway. Most video editors automatically handle this if your project sequence is set to stereo.
Loudness target: Aim for an integrated loudness of -14 LUFS for your final mix. This matches YouTube’s loudness normalization target. If your audio is significantly louder, YouTube will turn it down automatically, which can compress the dynamic range in undesirable ways. If it is significantly quieter, viewers will need to turn up their volume and may hear more noise in the background. Premiere Pro and DaVinci Resolve both have loudness meters that display LUFS in real time.
Upload and verify. After uploading to YouTube, play the video in YouTube Studio’s preview player and listen through the first two minutes with headphones. YouTube re-encodes audio during processing, and occasionally the re-encoded version sounds slightly different from your local export. If everything sounds clean, you are done.
Edge Cases
Not every YouTube project fits the standard workflow. Here are solutions for situations that come up regularly.
Videos longer than 20 minutes. For long-form content, your character quota becomes the main constraint. A 20-minute voiceover uses roughly 20,000 to 25,000 characters. If you are on the Starter plan with 30,000 characters per month, that is most of your monthly budget in one video. The Creator plan at 100,000 characters per month handles long-form production comfortably. Alternatively, generate the voiceover across two billing cycles by splitting the script and generating half each month.
Maintaining voice consistency across uploads. Always use the same voice, model, and parameter settings for every video. Save your settings as a note or template: “Voice: Rachel, Model: Multilingual v2, Stability: 0.65, Similarity: 0.80.” Consistency across videos builds audience familiarity with your narration, which is especially important for faceless channels where the voice is the brand identity.
Batch generation for content series. If you produce a weekly series, write and generate all voiceovers in one session. This reduces context-switching and ensures consistent audio quality across the batch. Generate all sections for Video 1, then all sections for Video 2, and so on. Label files with both the video number and section number: v01-01-hook.mp3, v01-02-intro.mp3, v02-01-hook.mp3. For teams using Zapier to automate voiceover generation, the ElevenLabs Zapier Automations guide covers how to trigger batch generation from a content publishing event.
Pronunciation errors. AI voices occasionally mispronounce brand names, technical terms, or uncommon words. The ElevenLabs Pronunciation Dictionary lets you define custom pronunciations that persist across all future generations. See the Pronunciation Dictionary guide for setup instructions. As a quick fix, you can also spell out phonetic pronunciations in your script - writing “koo-ber-net-eez” instead of “Kubernetes,” for example - and then correct it in your video subtitles. For multilingual channels, the ElevenLabs Multilingual Dubbing Workflow covers cross-language pronunciation.
Multiple voices in one video. For dialogue, interview simulations, or videos where different speakers cover different topics, generate each speaker’s sections separately with their own voice. Import all files into your editor and place each speaker on a different audio track. This makes volume balancing and timing adjustments much easier than mixing voices on a single track. The ElevenLabs Studio First Project guide covers Studio’s multi-character workflow if you want to manage all voices in one place.
Templates
These script templates give you a starting structure for common YouTube formats. Copy the template, replace the bracketed placeholders with your content, and follow the workflow starting from Step 1.
Tutorial Format
[Hook: 1-2 sentences stating what the viewer will learn]

[Brief intro: Who this is for and why it matters]

[Step 1: First instruction with clear action verb]

[Step 2: Second instruction building on Step 1]

[Step 3: Continue the sequence]

[Common mistake to avoid at this point]

[Steps 4-N: Remaining instructions]

[Summary: Recap the key steps in 2-3 sentences]

[CTA: What to do next, subscribe prompt]
Product Review Format
[Hook: The key verdict in one sentence]

[Context: What this product is and who it is for]

[What I liked: 3-4 specific positives with examples]

[What could be better: 2-3 honest criticisms]

[Pricing breakdown: Plans, value assessment]

[Who should buy this: Specific use cases]

[Who should skip it: When alternatives are better]

[Final verdict: Recommendation with rating]
Listicle Format
[Hook: "Here are N [things] that [benefit]"]

[Brief qualifying statement: selection criteria]

[Item N (start high): Name, one-sentence description, why it made the list]

[Item N-1: Same structure]

[Continue through all items]

[Item 1: The top pick with slightly more detail]

[Honorable mentions: 1-2 that almost made the list]

[CTA: Which one are you trying first? Comment below]
Explainer Format
[Hook: The question this video answers]

[Why this matters: Stakes, relevance, timeliness]

[Background: What the viewer needs to know first]

[The core explanation: Main concept broken into 3-5 digestible points]

[Real-world example: Concrete application of the concept]

[Common misconceptions: 1-2 things people get wrong]

[What this means for you: Practical takeaway]

[CTA: Related video or deeper dive]
Frequently Asked Questions
How many YouTube videos can I produce per month with ElevenLabs?
That depends on your plan and video length. A rough rule of thumb: 1,000 characters equals about 1 minute of audio. The Starter plan at 30,000 characters per month supports roughly 30 minutes of total voiceover - enough for three 10-minute videos or six 5-minute videos. The Creator plan at 100,000 characters handles about 100 minutes. Factor in that voice testing during Step 2 also consumes characters, so budget approximately 10% to 15% of your monthly quota for testing. Compare all options on the pricing page.
Will YouTube flag AI-generated voiceover content?
YouTube requires creators to disclose when realistic synthetic content is used in videos, particularly when it depicts real people or events - the official YouTube AI disclosure policy lays out exactly when disclosure is required. For narration voiceover using stock AI voices - the standard use case covered in this guide - most creators add a brief note in the video description mentioning AI-generated narration. YouTube does not penalize or suppress videos for using AI voiceover, and many of the largest faceless channels on the platform use AI narration as their primary audio source.
Can I use ElevenLabs voiceover on monetized YouTube channels?
Yes, but you need a paid plan. The free tier does not include a commercial license. Starting from the Starter plan at $5 per month, all generated audio is cleared for commercial use, including monetized YouTube videos, sponsored content, and paid promotions. This covers all voices in the Voice Library and any voices you create through cloning or Voice Design. Confirm the latest licensing terms on the ElevenLabs pricing page before publishing sponsored work.
What audio format should I download from ElevenLabs for video editing?
Download as MP3 at the highest available quality for most workflows. MP3 files are smaller and import cleanly into all major video editors. If you are working on a project where audio quality is paramount and file size is not a concern - such as a documentary or premium course - download as WAV for lossless quality. The difference is subtle after YouTube re-encodes your upload, but WAV preserves more detail during your local editing process.
How do I handle script changes after generating audio?
Regenerate only the affected section. This is the main advantage of the section-by-section generation approach in Step 3. If you change two sentences in your third script section, regenerate only that section with the same voice and settings, download it, and replace the old file in your editor timeline. Your other sections remain unchanged. Name the replacement file with the same convention so it is easy to identify on import. The ElevenLabs Studio First Project guide covers Studio’s project view if you want to manage all sections in one place.
Want to learn more about ElevenLabs?
Related Reading
- ElevenLabs - Full platform review with pricing, ratings, and feature breakdown
- Best AI Voice Generators 2026 - How ElevenLabs compares to Murf, LOVO, WellSaid Labs, and others
- AI Voiceover Tips for Corporate Training - Applying voiceover workflows to training and e-learning content
- ElevenLabs Voice Cloning Tutorial - Clone your own voice for a personal narration brand
Related Guides
- ElevenLabs Voice Library Guide - Browse and shortlist voices for your channel brand
- ElevenLabs Voice Design v3 Guide - Build a custom character voice from a text prompt
- ElevenLabs Voice Isolator Guide - Clean noisy reference audio before voice cloning
- ElevenLabs Audio Quality Optimization - Stability and similarity tuning for narration
External Resources
- ElevenLabs Text to Speech Documentation - Official reference for models, parameters, and API limits
- YouTube Loudness Normalization - Official YouTube guidance on the -14 LUFS target
- YouTube AI Disclosure Policy - When and how to disclose AI-generated content on YouTube
Related Guides
- AI Video Creation Tips: 2026 Walkthrough for Teams
- AI Voice Cloning Ethics Best Practices: Complete 2026 Guide
- AI Voiceover Corporate Training With WellSaid Labs
- AI Voiceover Tips: Making Synthetic Voices Sound Human
- ElevenLabs API Setup: Developer Quick Start Guide (2026)
- ElevenLabs Audio Native Embed Audio on Any Website
- ElevenLabs Audio Quality Settings: Pro Tips and Settings
- ElevenLabs Audiobook Creation: Long-Form Audiobook
- ElevenLabs Conversational AI Agents: Build Voice Agents
- ElevenLabs Dubbing Studio: Video Translation and Dubbing