

If you have been copying text into the basic ElevenLabs text-to-speech box and downloading one clip at a time, you are leaving most of the platform’s power on the table. This ElevenLabs Studio tutorial walks you through creating your first real voice project using Studio 3.0 - the multi-track, timeline-based workspace that turns ElevenLabs from a simple TTS tool into a full audio production environment. For a wider category context, see our best AI voice generators 2026 roundup.
Studio is where things get practical. Instead of generating audio one paragraph at a time, you can import an entire script, assign different voices to different sections, fine-tune pronunciation with audio tags, and export a polished final file - all without leaving your browser. Think of it as the difference between typing one sentence at a time in a text editor versus writing in a proper word processor with formatting, structure, and export options.
This ElevenLabs Studio tutorial covers everything from account prerequisites to speech synthesis and exporting your finished project. By the end, you will have a completed voice project and the knowledge to build more complex productions like multi-chapter audiobooks, training videos with multiple speakers, and podcast-style content.
Prerequisites
Before starting this ElevenLabs Studio tutorial for beginners, make sure you have the following ready.
An ElevenLabs account on the Starter tier or above. Studio is not available on the free plan. The Starter tier costs $5 per month and includes 30,000 characters of generation - enough for roughly 30 minutes of audio. If you do not have an account yet, sign up at ElevenLabs and select the Starter plan during onboarding - current ElevenLabs pricing lays out every tier, character allowance, and feature gate. The free trial lets you test basic text-to-speech, but you need a paid tier to access the Studio workspace. New users following our getting started with ElevenLabs walkthrough already have everything they need.
Your script or text content. Have your text ready in a document, text file, or even just your clipboard. Studio accepts plain text, and you can also paste formatted content - it strips the formatting automatically. For your first project, aim for something between 500 and 2,000 characters (roughly 1 to 3 minutes of audio). This keeps generation costs low while giving you enough material to experiment with the editing tools.
A clear idea of your project type. Are you creating a narrated blog post? A training video voiceover? A dialogue between two characters? Knowing this upfront helps you choose the right AI voice or voices and plan your project structure before you start generating audio.
Headphones or speakers for playback. You will be listening to generated audio throughout this guide and making adjustments based on what you hear. Decent headphones help you catch subtle quality issues that laptop speakers might miss.
ElevenLabs Studio Tutorial: Studio Overview
Navigate to elevenlabs.com and log in to your account. Click Studio in the left sidebar. If you are on the Starter plan or above, you will land in the Studio workspace.
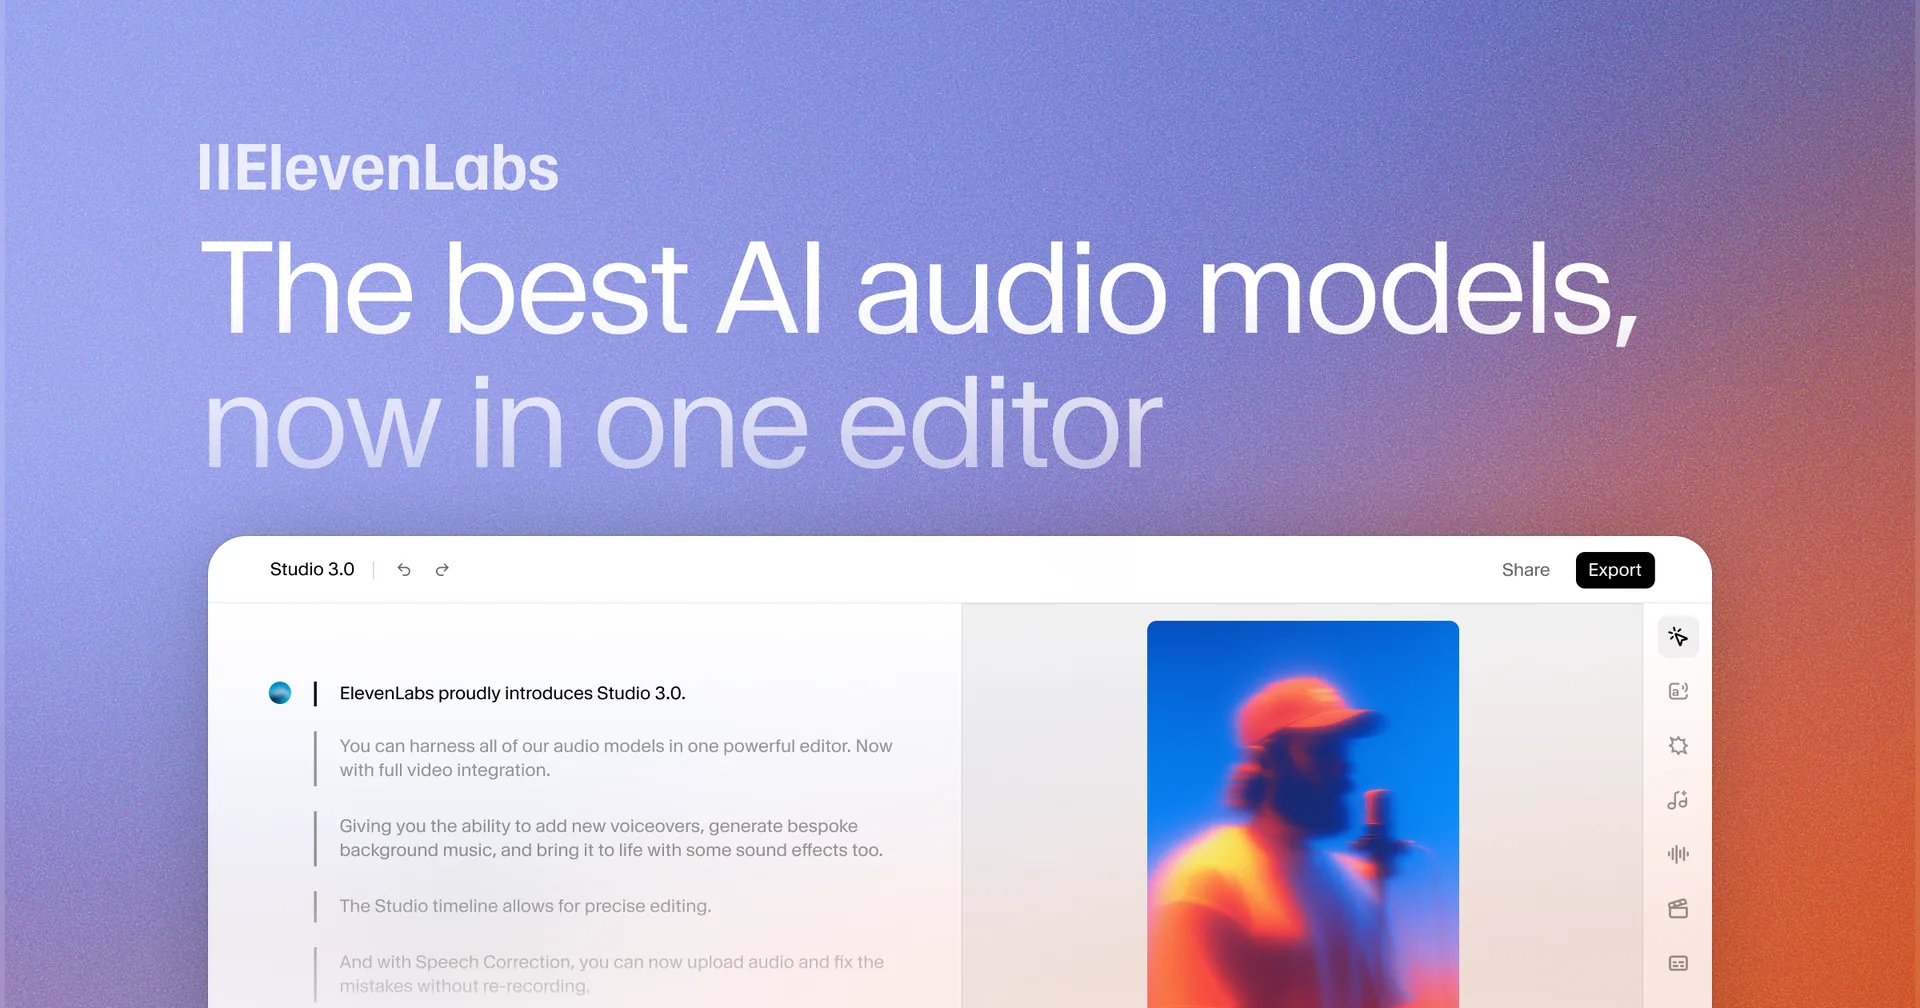
Studio 3.0 launched in late 2025 (see the official Studio 3.0 announcement) and is a significant upgrade over the earlier Projects feature. Here is what you are looking at:
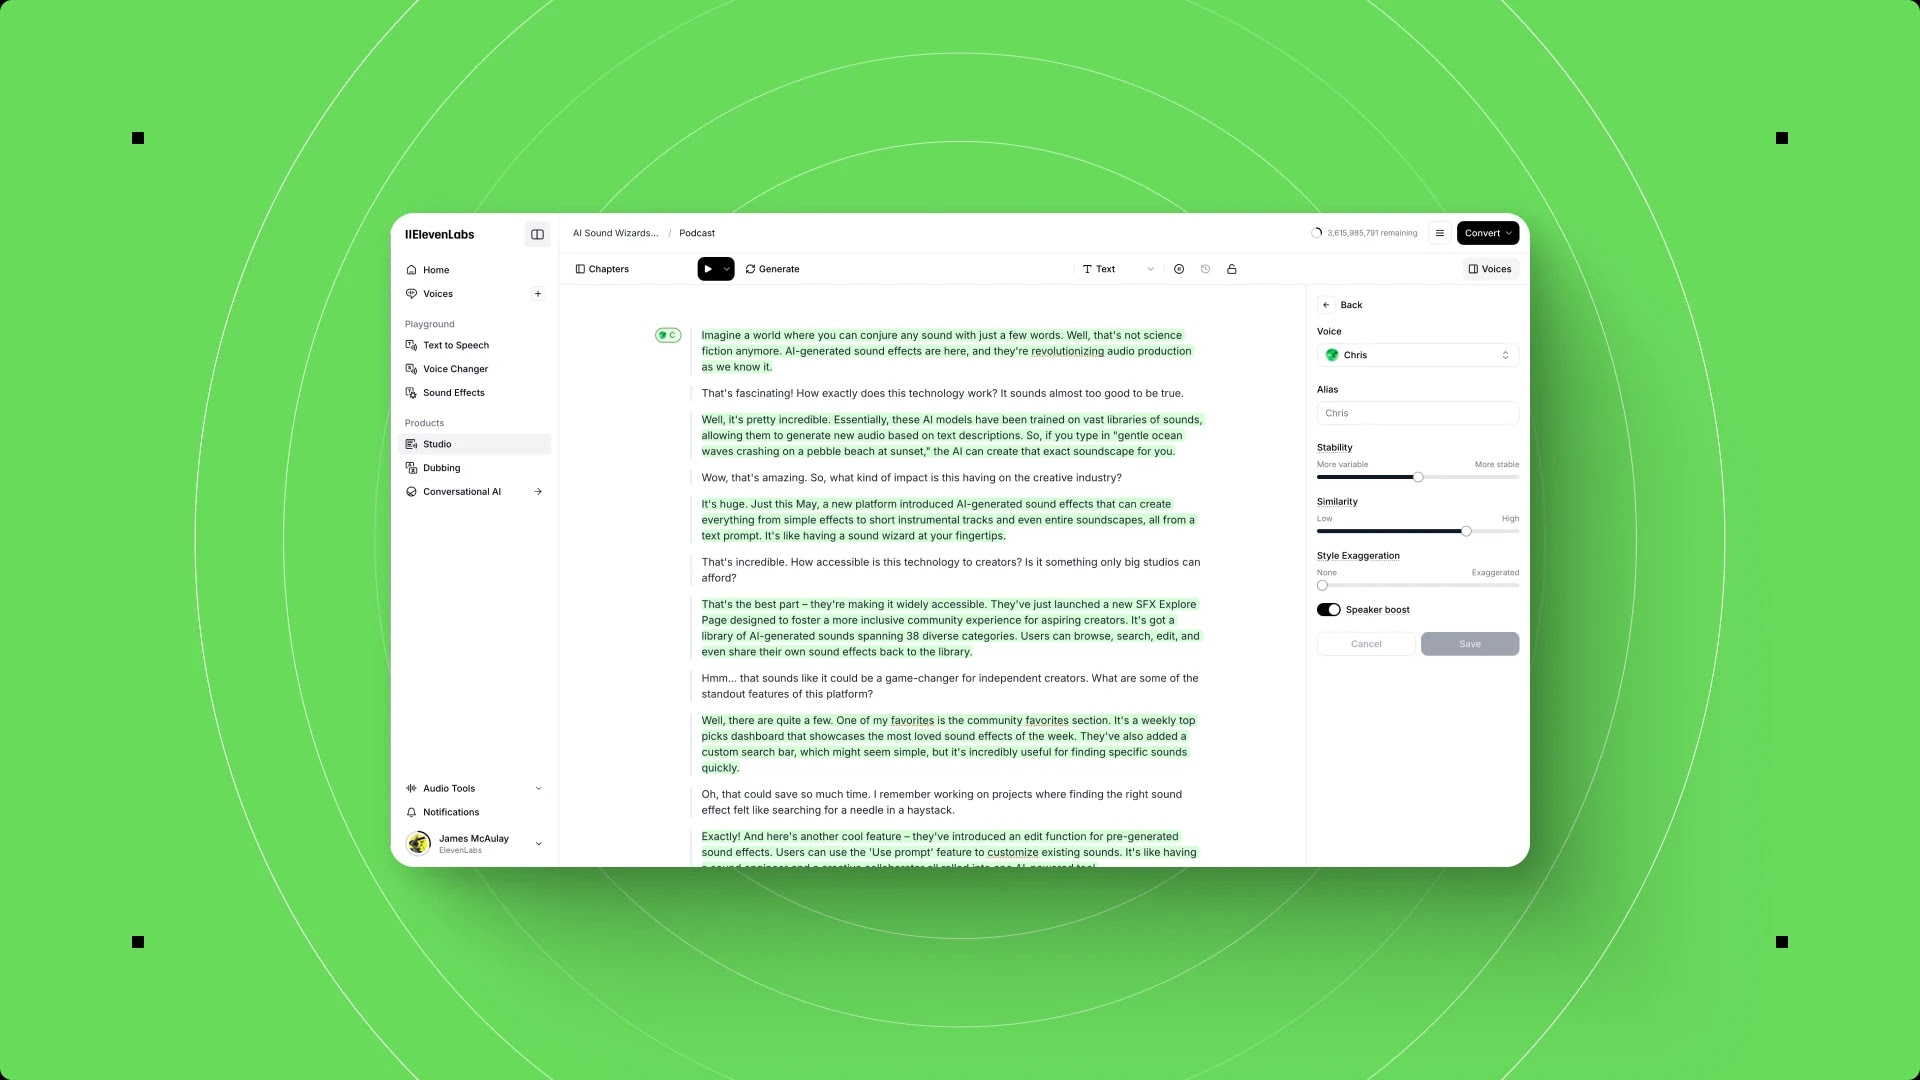
The timeline editor. The bottom section of the screen shows a visual timeline where your audio blocks appear. Each block represents a section of text that has been converted to speech. You can drag blocks to reorder them, trim their edges, and adjust spacing between segments. This is the core of Studio - it lets you treat voice generation like audio editing rather than one-off clip creation.
The text panel. The left or center panel is where you write or paste your script. Text is organized into blocks that correspond to audio segments on the timeline. You can split a single block into multiple blocks, merge blocks together, or insert new blocks between existing ones.
The voice assignment panel. Each text block can have a different voice assigned to it. This is what makes Studio powerful for dialogue, multi-narrator projects, or any content where you want different sections to sound distinct. You assign voices at the block level, so a single project can use as many voices as you need.
Multi-track support. Studio 3.0 introduced multi-track editing, meaning you can layer audio tracks on top of each other. This is useful for adding background music, sound effects, or creating overlapping dialogue. Tracks appear as separate rows on the timeline - if you need royalty-free background beds, libraries like Uppbeat integrate cleanly with downstream video editors.
Built-in captions. Studio automatically generates captions synced to your audio. You can export these as SRT files alongside your audio - a huge time saver for video production where you would otherwise need to run your audio through a separate transcription tool.
Cost estimation. Each text block shows a character count, and the project view displays total character usage. On the Starter plan at $5 per month, you get 30,000 characters. A rough rule of thumb: 1,000 characters equals about 1 minute of audio. So a 5-minute narration costs roughly 5,000 characters, and you could produce about six 5-minute projects per month on the Starter tier before hitting your limit.
Creating a Project
Click the New Project button in the top-left corner of Studio. You will see a dialog with project settings.
Project name. Give it something descriptive - “Product Demo Voiceover March 2026” is better than “Test Project 1.” You will accumulate projects over time, and clear names save you from clicking through each one to find what you need later.
Default voice. Select a voice that will be used as the starting point for all text blocks. You can change individual block voices later, but picking a good default saves time. If you are not sure which voice to use yet, pick one of ElevenLabs’ pre-made voices like Rachel (warm, narrative) or Adam (clear, professional) - you can swap them out after hearing the results.
Model selection. ElevenLabs offers multiple models:
- Eleven Multilingual v2 - The default choice for most projects. Supports 29 languages and handles emotional delivery well. Best balance of quality and speed.
- Eleven Turbo v2.5 - Faster generation with slightly lower quality. Good for rapid prototyping or when you need results quickly and plan to refine later.
- Eleven English v1 - English only, but some users prefer its tone for specific narration styles.
For your first project, stick with Eleven Multilingual v2 unless you have a specific reason to choose otherwise. Throughout this ElevenLabs Studio tutorial, we will assume that selection - the quality difference is noticeable, and the generation speed is still fast enough for interactive editing.
Click Create and you will land in your new project workspace with an empty text panel.
Adding Text
There are three ways to get your script into Studio.
Direct Typing
Click in the text panel and start typing. Each paragraph you create becomes a separate text block on the timeline. Press Enter twice to create a new block. This method works well for short projects or when you are writing the script as you go.
Paste from Clipboard
Copy your text from any source - Google Docs, Notion, a text file - and paste it into the text panel with Ctrl+V (or Cmd+V on Mac). Studio strips formatting and splits your text into blocks based on paragraph breaks. For longer scripts, this is the fastest method.
File Import
For substantial projects like audiobook chapters or long-form training scripts, click the Import button in the text panel toolbar. Studio accepts TXT and DOCX files. The import feature preserves paragraph structure, converting each paragraph into a separate block.
Block management tips:
- Split a block. Place your cursor where you want the split and click the split icon in the block toolbar (or use the keyboard shortcut). This is useful when you want to assign a different voice to part of a paragraph - for example, splitting quoted dialogue from narration.
- Merge blocks. Select two adjacent blocks and click merge. The text combines into a single block with the voice assignment of the first block.
- Reorder blocks. Drag blocks up or down in the text panel, or drag their corresponding audio segments on the timeline. The text and timeline stay synchronized.
- Insert a block. Click the plus icon between two existing blocks to add a new empty block. This is handy for adding transitions, pauses, or additional narration between existing sections.
For your first project, paste in your prepared text and review how Studio splits it into blocks. If any blocks are too long (over 2,500 characters), consider splitting them - shorter blocks give you more granular control over voice and pacing.
Selecting Voices
With your text in place, it is time to assign voices. This is where Studio moves beyond basic text-to-speech and into real production territory.
Using Pre-Made Voices
Click on any text block to select it, then click the voice selector dropdown. You will see several categories:
- Featured voices - ElevenLabs’ curated selection of high-quality voices. These are reliable, well-tuned, and cover a range of ages, genders, and speaking styles.
- Voice Library - A community library with thousands of voices created and shared by other users. You can preview any voice before adding it to your project. Filter by language, accent, age, gender, and use case.
- My voices - Any voices you have cloned or previously saved. If you have followed the ElevenLabs voice cloning tutorial, your cloned voices appear here. Our AI voice cloning playbook covers consent and ethics if you plan to clone someone other than yourself.
Choosing the right voice for your project type:
| Project Type | Recommended Voice Style | Example Voices |
|---|---|---|
| Blog narration | Warm, conversational, medium pace | Rachel, Charlotte |
| Training video | Clear, authoritative, measured pace | Adam, Daniel |
| Podcast intro | Energetic, engaging, slightly faster | Josh, Bella |
| Audiobook | Expressive, varied pacing, emotional range | Dorothy, Clyde |
| Product demo | Professional, friendly, confident | Elli, Arnold |
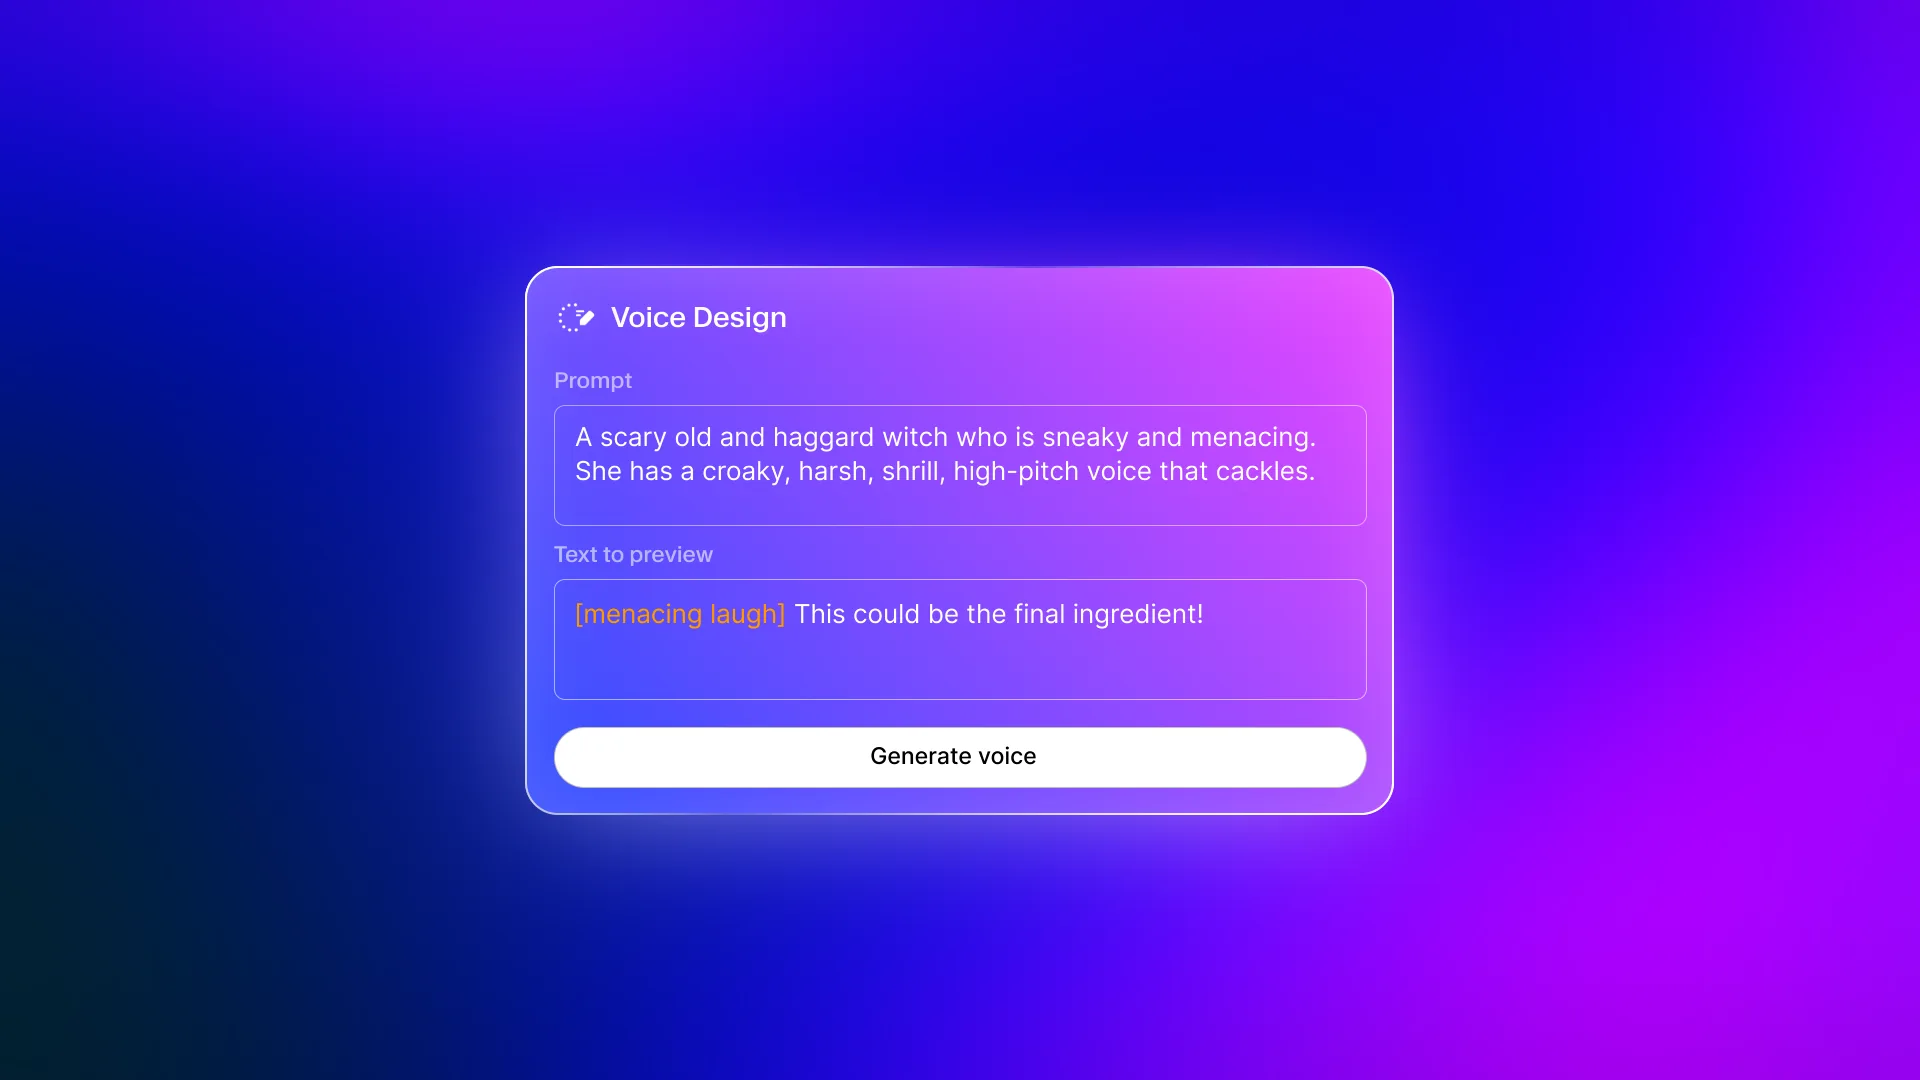
Voice Design v3
If none of the existing voices fit your needs, ElevenLabs’ Voice Design v3 lets you create a completely new voice by describing what you want. Click Voice Design in the voice selector, then type a description like “a warm female voice in her 30s with a slight British accent, speaking at a conversational pace.” The AI generates a voice matching your description.
Voice Design is available on the Starter plan and above, and it does not consume extra credits beyond the normal character usage. You can generate multiple voice previews and save the one you like best to your voice library.
Assigning Different Voices to Segments
For multi-speaker projects, click each text block individually and assign the appropriate voice. Studio color-codes blocks by voice assignment, so you can visually scan the text panel and see which voice speaks which section.
A practical example: if you are creating a dialogue between a customer and a support agent, assign one voice (like Rachel) to all customer blocks and a different voice (like Adam) to all support agent blocks. You can select multiple blocks at once by holding Shift and clicking, then assign a voice to all selected blocks simultaneously.
Cost note: Voice assignment does not affect character costs. Whether you use one voice or ten voices, you pay the same per-character rate. The only cost difference comes from regenerating blocks to try different voices - each regeneration consumes characters from your quota.
Audio Settings
After assigning voices and generating your initial audio, you will likely want to fine-tune how certain words or phrases sound. This is where audio tags come in - they are Studio’s precision controls for speech output.
Audio Tags
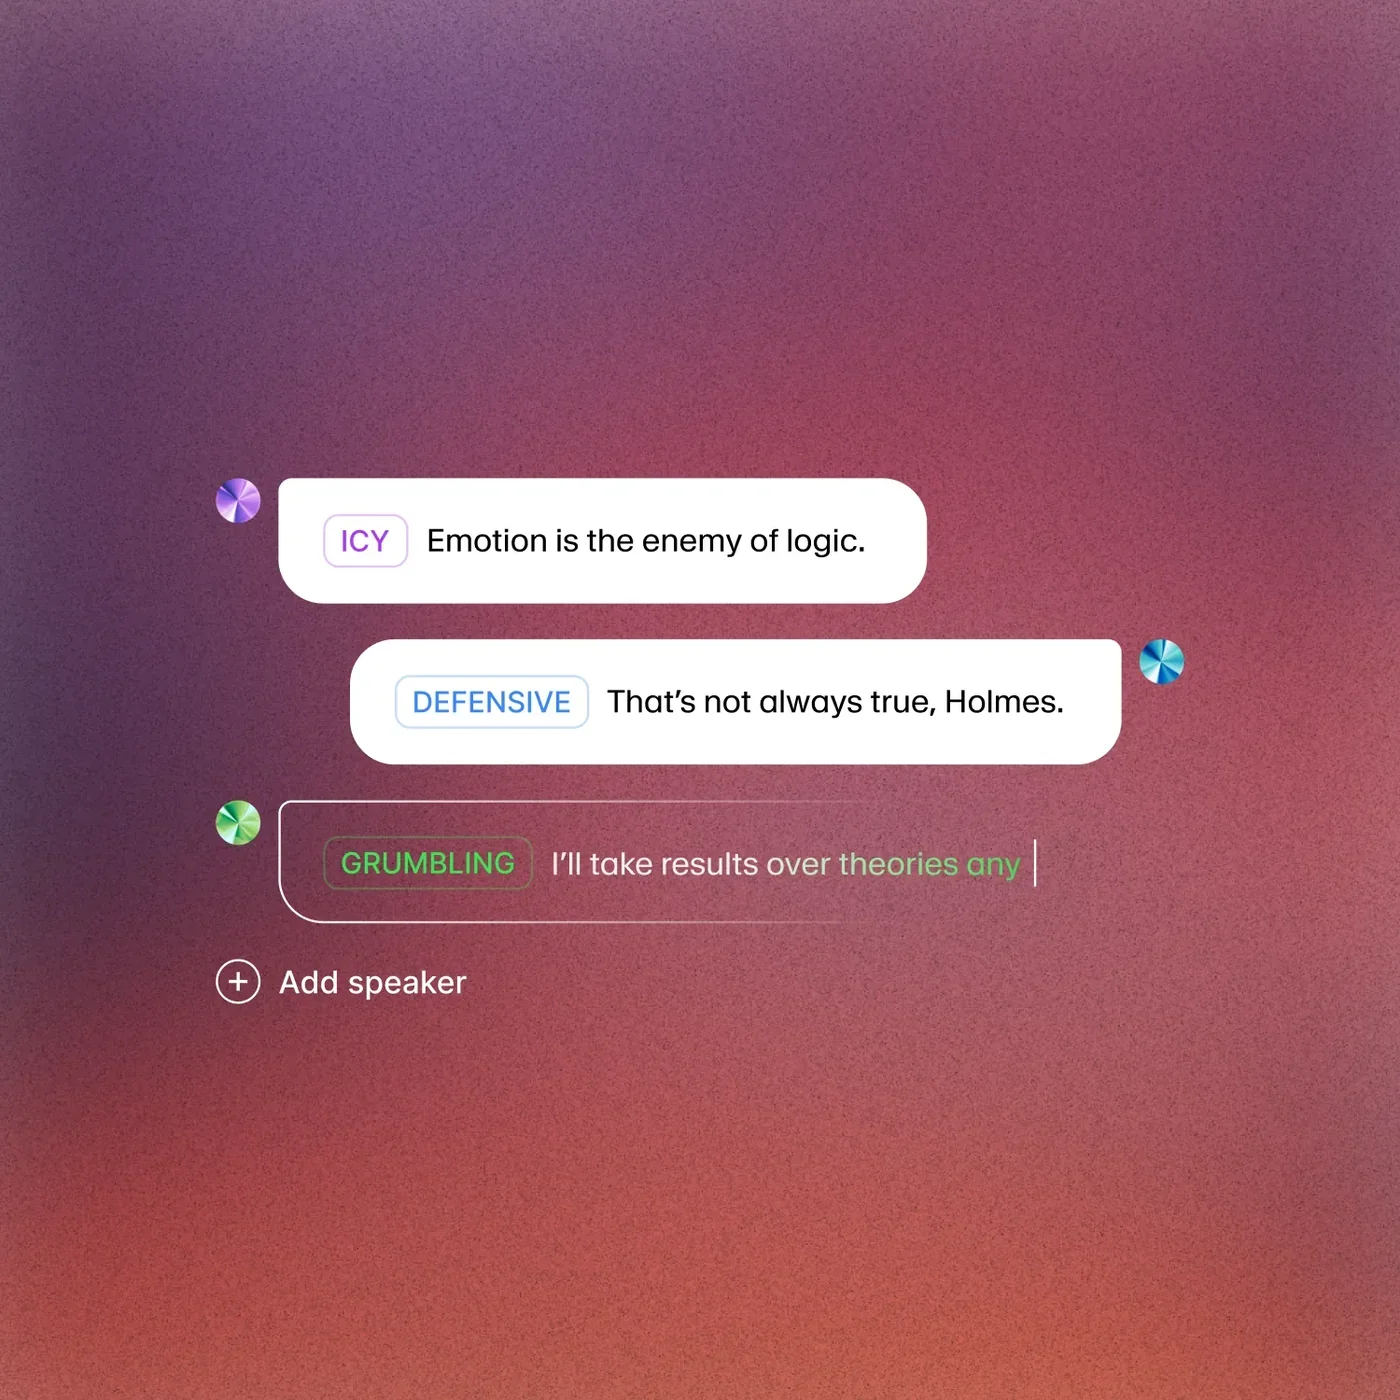
Audio tags are inline annotations you add to your text to control specific aspects of speech generation. They use a simple syntax that you type directly into your text blocks.
Pause tag. Insert a pause of a specific duration between words or sentences:
Welcome to the presentation. <break time="1.5s" /> Let us begin with the overview.This adds a 1.5-second silence between the two sentences. Useful for giving listeners time to process information, creating dramatic pauses, or matching timing to video content.
Emphasis tag. Stress a particular word more than the surrounding text:
This is <emphasis level="strong">critically</emphasis> important to understand.Emphasis levels include reduced, moderate, and strong. Use this sparingly - overusing emphasis makes speech sound unnatural, but a well-placed emphasis tag can add conviction to key points.
Phoneme tag. Override pronunciation for words the AI might mispronounce - typically brand names, technical terms, or uncommon words:
The <phoneme alphabet="ipa" ph="naIki">Nike</phoneme> brand campaign launched in Q2.This uses the International Phonetic Alphabet to specify exactly how to pronounce the word. You do not need to memorize IPA - a quick web search for “IPA pronunciation of [word]” gives you the notation.
Say-as tag. Control how the AI interprets and speaks specific content types:
Call us at <say-as interpret-as="telephone">+1-800-555-0199</say-as>.
The meeting is on <say-as interpret-as="date">2026-03-15</say-as>.
This ensures phone numbers are read as phone numbers (not as math), dates are spoken naturally, and other formatted content comes out correctly.
Stability and Similarity Settings
Each voice in Studio has two sliders that affect audio quality:
- Stability (0 to 1) - Higher values produce more consistent, predictable speech. Lower values add more variation and expressiveness but may introduce inconsistencies. For narration and training content, keep this at 0.5 to 0.7. For character dialogue or expressive content, try 0.3 to 0.5.
- Similarity (0 to 1) - Higher values make the output sound more like the original voice sample. Lower values give the model more creative freedom. Keep this at 0.7 or above for cloned voices to maintain recognition. For pre-made voices, the default of 0.75 works well.
These settings apply per text block, so you can have narration blocks set to high stability and dialogue blocks set to lower stability within the same project.
Speed Control
Studio lets you adjust playback speed per block or for the entire project. The speed slider ranges from 0.7x (slower) to 1.3x (faster) relative to the natural speaking pace. For most voiceover work, leave speed at 1.0x and use the pause tags to control pacing instead. Speed adjustments can introduce artifacts at extreme values.
Export and Share
Once you are happy with your project, it is time to export.
Export Formats
Click the Export button in the top-right corner of Studio. You will see several options:
- MP3 - The most common choice. Smaller file size, compatible with everything. Use this for podcast distribution, blog embeds, social media, and general-purpose audio.
- WAV - Uncompressed audio. Larger files but no quality loss. Choose WAV when you plan to import the audio into a video editor (Premiere Pro, DaVinci Resolve, Final Cut) or audio workstation (Audacity, Logic Pro) for further editing.
- FLAC - Lossless compression. A middle ground between MP3 and WAV - smaller than WAV but no quality loss. Good for archival purposes.
Export Options
- Export entire project - Combines all blocks into a single audio file in timeline order. This is the default and what you want for finished productions.
- Export individual blocks - Downloads each text block as a separate audio file. Useful when you need individual segments for different parts of a video or when different sections will be used in different contexts.
- Export with captions - Adds an SRT subtitle file alongside your audio. The captions are automatically synced to the audio timestamps. This saves significant time compared to manually transcribing or running your audio through a separate captioning tool.
Sharing and Collaboration
Studio projects are private by default. You can share a project with collaborators by clicking Share and entering their email addresses. Collaborators can view the project, make text edits, and regenerate audio - but they consume characters from your account’s quota, not theirs. Keep this in mind when sharing with teams.
For client delivery, the export approach works better than sharing project access. Export the final audio, download it, and send the file directly via your usual hand-off channel - Dropbox, WeTransfer, or whatever your team already uses. This protects your project from accidental edits and keeps your character usage under your control.
Pro Tips
These tips come from working through this ElevenLabs Studio tutorial workflow across dozens of projects. They will save you time and characters.
Preview before committing. Generate one block first and listen carefully before generating the entire project. If the voice does not sound right or the pronunciation is off, fix it on a single block rather than regenerating everything. Each regeneration costs characters.
Use block-level regeneration. When a single block sounds off, right-click it on the timeline and select Regenerate. Studio regenerates only that block, preserving everything else. This costs characters only for the regenerated block, not the whole project.
Build a voice shortlist. Before starting a project, open the Voice Library and preview 5 to 10 voices with a sample sentence from your actual script. Save your favorites. This front-loaded selection process is faster than swapping voices mid-project and regenerating blocks.
Plan multi-chapter projects carefully. For long content like audiobooks or training courses, create separate Studio projects for each chapter. This keeps individual projects manageable and lets you export chapters independently. Name them systematically - “Course Module 01 - Introduction,” “Course Module 02 - Fundamentals,” and so on. Our audiobook production workflow covers the chapter-pacing patterns that work across both fiction and non-fiction.
Monitor your character usage. Check your remaining character quota in account settings before starting a large project. A 10-minute narration requires roughly 10,000 characters. If you are on the Starter plan with 30,000 characters per month, a 30-minute project will consume your entire monthly allocation. Plan regenerations carefully and consider upgrading to the Creator plan ($22 per month, 100,000 characters) - tier comparison details live on the official pricing page if you want a per-feature view before committing.
Use paragraph breaks strategically. Studio inserts natural pauses at paragraph breaks. Instead of adding pause tags everywhere, structure your text with shorter paragraphs where you want breathing room. Reserve explicit pause tags for precise timing requirements - the ElevenLabs prompting reference covers the full audio-tag vocabulary if you need finer control.
Test audio tags on a scratch block. Create a temporary text block at the bottom of your project to experiment with phoneme tags, emphasis levels, and pause durations. Once you have the syntax right, copy it into your actual content blocks and delete the scratch block.
Export WAV for video editing. Even if your final distribution format is MP3, export WAV from Studio and do the MP3 conversion in your video editor or audio tool. This preserves quality through your editing pipeline and gives you the most flexibility.
Frequently Asked Questions
Do I need a paid plan to use Studio?
Yes. Studio requires the Starter plan at minimum, which costs $5 per month and includes 30,000 characters. The free tier only gives you access to the basic text-to-speech converter, not the full Studio workspace with timeline editing, multi-track support, and project management. If you are just testing whether ElevenLabs works for your use case, the free tier is fine for generating individual clips - but for any real production workflow, the Starter plan is the entry point.
How many characters does a typical project use?
A rough benchmark is 1,000 characters per minute of audio. A 5-minute narration uses about 5,000 characters, a 10-minute training video voiceover uses about 10,000 characters, and a 30-minute podcast episode uses about 30,000 characters (your entire Starter plan allocation). Keep in mind that regenerating a block consumes additional characters - if you regenerate a 500-character block three times to get it right, that block costs 2,000 characters total (the original generation plus three regenerations). Plan your budget accordingly, especially on lower-tier plans.
Can I use Studio for multi-language projects?
Yes, if you are using the Eleven Multilingual v2 model. Studio supports 29 languages, and you can mix languages within a single project by assigning language-appropriate voices to different blocks. For example, you could have English narration blocks alternating with Spanish translation blocks in the same project. Each block respects the language of its assigned voice. The best AI translation tools roundup covers how ElevenLabs compares to dedicated translation platforms.
What happens if I run out of characters mid-project?
Your existing generated audio is preserved - you do not lose any work. You simply cannot generate new blocks or regenerate existing ones until your quota resets at the start of your next billing cycle. If you need more characters immediately, you can upgrade your plan mid-cycle and the additional characters become available instantly. ElevenLabs also offers add-on character packs on some plans if you need a one-time boost without changing your subscription tier.
Can I edit the audio after generation without regenerating?
Studio’s timeline editor lets you trim the beginning and end of audio blocks, adjust spacing between blocks, and reorder segments - all without regenerating and without consuming characters. However, you cannot edit the audio waveform itself (like removing a specific word from the middle of a block). For that level of editing, export the audio as WAV and use a dedicated audio editor like Audacity or Descript. If you only need to fix one word, it is often faster to split the block around that word, regenerate just the small segment, and piece it back together on the timeline.
How does Studio compare to the basic text-to-speech converter?
The basic converter is a single text box that generates one audio clip at a time. Studio is a full workspace with project management, timeline editing, multi-track support, per-block voice assignment, audio tags, caption export, and collaboration features. If you are generating a single short clip, the basic converter is faster. If you are producing anything longer than a few paragraphs - or anything with multiple voices, precise timing, or professional export requirements - Studio is dramatically more efficient. Most users who try Studio do not go back to the basic converter for anything beyond quick one-off generations.
Final Thoughts: Putting Your ElevenLabs Studio Tutorial Skills to Work
Working through this ElevenLabs Studio tutorial gives you the foundation to take on real production work - multi-narrator audiobooks, training video voiceovers, branded podcast intros, and any voice project that needs more than a single TTS clip. The keys are picking the right model, structuring your text into manageable blocks, and using audio tags surgically rather than sprinkling them everywhere. Once that workflow becomes muscle memory, the platform’s value compounds quickly: ElevenLabs pricing stays predictable while your output grows from minutes per month into full audio libraries. Bookmark the ElevenLabs review for an at-a-glance feature reference, and the natural next step is exploring voice cloning so your projects can carry a consistent narrator across every release.
Want to learn more about ElevenLabs?
Related Guides
- Getting Started with ElevenLabs - Account setup and first text-to-speech clip
- ElevenLabs Voice Cloning Tutorial - Build a custom voice for narration projects
- ElevenLabs Voice Design v3 Guide - Generate brand new voices from text descriptions
- ElevenLabs Audio Quality Optimization - Stability and similarity tuning for production audio
External Resources
- ElevenLabs Official Documentation - Studio reference, audio-tag syntax, and API details
- ElevenLabs Blog - Studio 3.0 release notes, model updates, and new voice library additions
- ElevenLabs Help Center - Troubleshooting guides for Studio rendering, exports, and team collaboration
Related Guides
- AI Video Creation Tips: 2026 Walkthrough for Teams
- AI Voice Cloning Ethics Best Practices: Complete 2026 Guide
- AI Voiceover Corporate Training With WellSaid Labs
- AI Voiceover Tips: Making Synthetic Voices Sound Human
- ElevenLabs API Setup: Developer Quick Start Guide (2026)
- ElevenLabs Audio Native Embed Audio on Any Website
- ElevenLabs Audio Quality Settings: Pro Tips and Settings
- ElevenLabs Audiobook Creation: Long-Form Audiobook
- ElevenLabs Conversational AI Agents: Build Voice Agents
- ElevenLabs Dubbing Studio: Video Translation and Dubbing