


Warp terminal guide is a complete walkthrough covering setup, configuration, and advanced workflows for Warp - an Agentic Development Environment built in Rust that replaces traditional terminals like iTerm2. It introduces a blocks-based interface, natural language command generation, and autonomous AI agents, helping developers eliminate the scroll-heavy workflow and reclaim significant time each day.
If you’re still using the default macOS Terminal or even iTerm2, you’re missing out on what might be the biggest productivity upgrade for developers in 2026. Warp isn’t just another terminal emulator-it’s an Agentic Development Environment (ADE) that fundamentally changes how you interact with the command line.
After three months using Warp as my primary terminal, I’m consistently saving 45-60 minutes per day. That’s not marketing hyperbole - it’s the cumulative effect of AI-generated terminal commands, intelligent error debugging, Warp terminal themes that reduce visual fatigue, and a blocks-based interface that eliminates the scroll-and-squint workflow we’ve all accepted as normal. For a broader picture of where Warp fits in modern dev tooling, our best AI coding assistants roundup is a good companion read, and our AI developer tools guide covers the wider IDE-plus-terminal stack.
This warp terminal guide covers everything from Warp terminal setup to advanced workflows, with real pricing analysis and honest comparisons to alternatives. Whether you’re evaluating Warp for the first time or looking to unlock its full potential, you’ll find actionable tips you can implement today.
What Makes Warp Different?
Warp Terminal Guide walks through the complete process from initial configuration to advanced usage. Whether you are starting fresh or optimizing an existing setup, this walkthrough covers every decision point, common pitfall, and the settings that make the biggest difference.
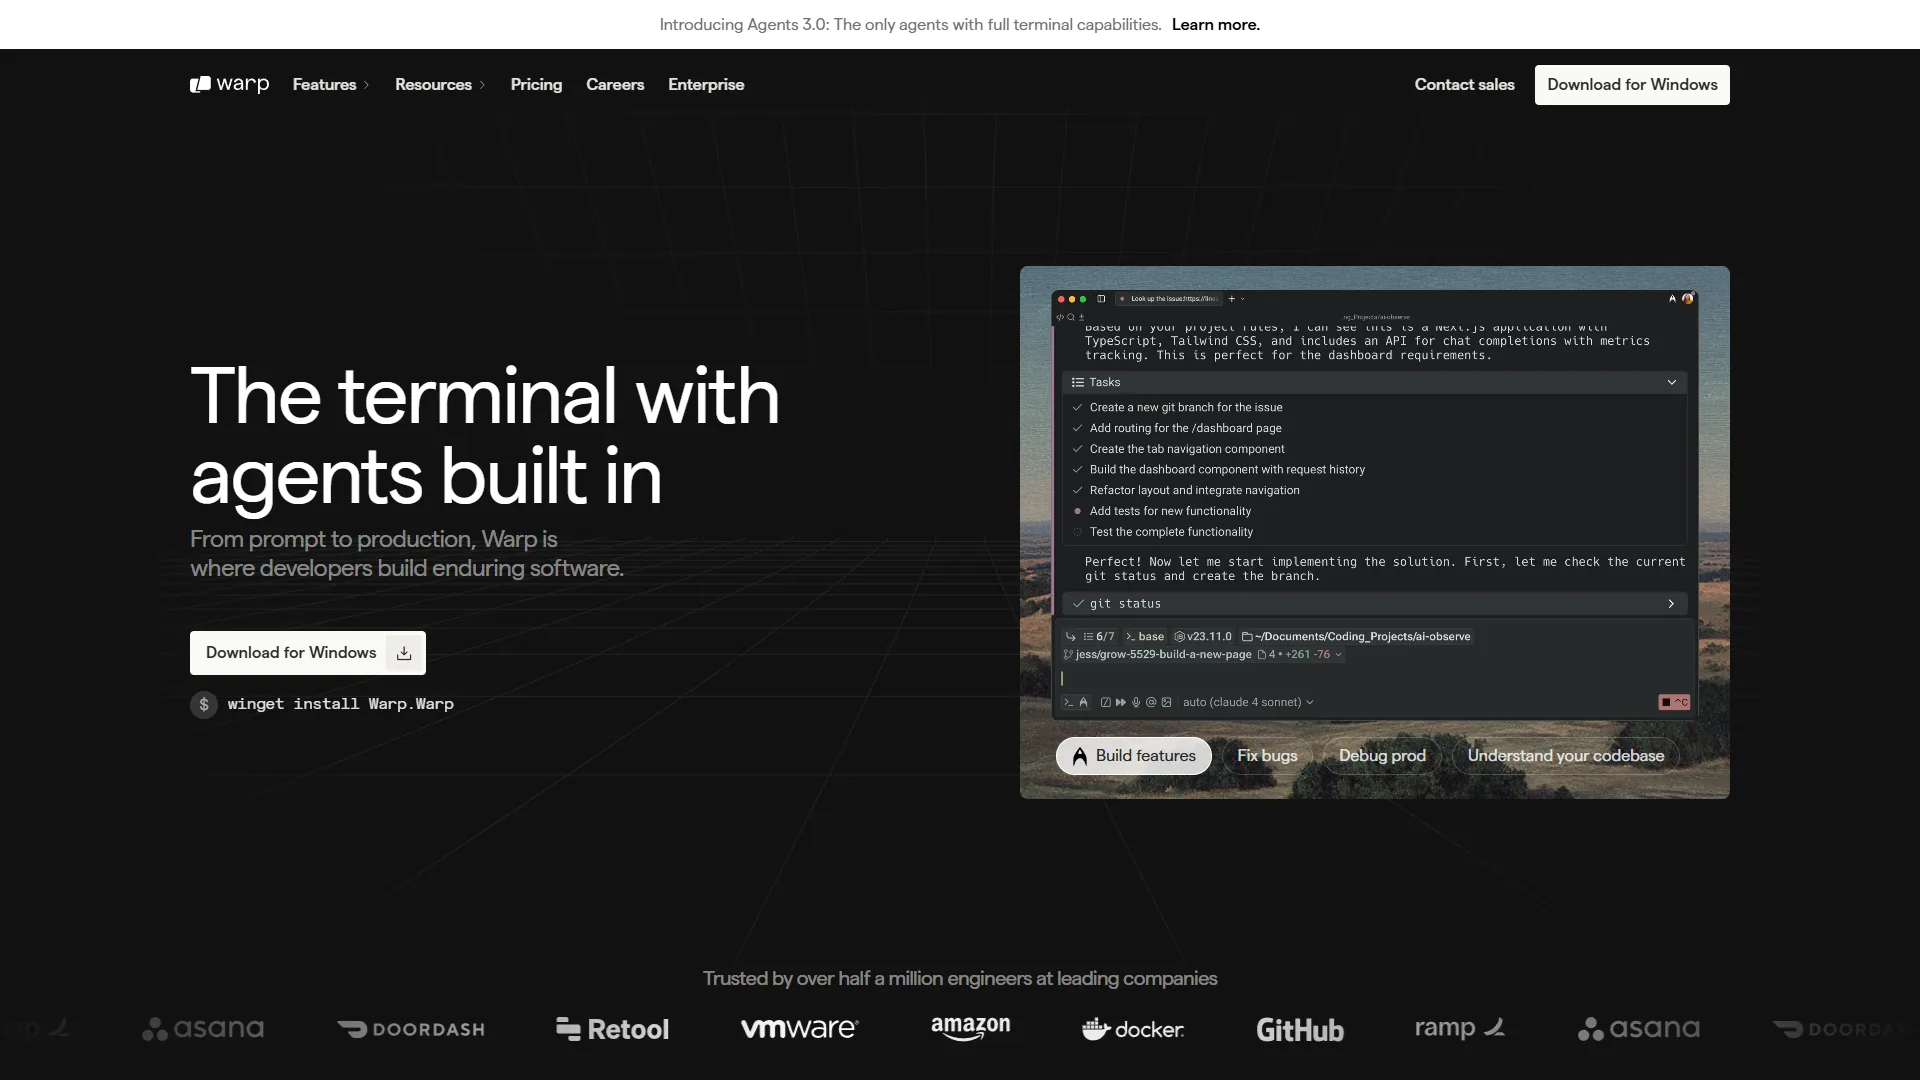
Traditional terminals treat your command history as an endless scroll of text. Warp treats each command and its output as a discrete block-a navigable, selectable, shareable unit that you can copy, filter, or reference later. This sounds like a small change until you realize you’re no longer squinting at 500 lines of output trying to find that one error message.
But the blocks interface is just the foundation. What really sets Warp apart is its AI integration:
- Natural language to commands: Type “find all files modified in the last 24 hours larger than 10MB” and Warp generates the exact
findcommand - Error debugging: Paste a cryptic stack trace and get a human-readable explanation plus suggested fixes
- Agents 3.0: Autonomous AI agents that can execute multi-step tasks, edit files, and even dispatch sub-agents for parallel work
Built from scratch in Rust, Warp delivers this AI power without sacrificing performance. It ranked #1 on Terminal-Bench for response time, which matters when you’re running thousands of commands per day. The Rust language foundation also explains the low memory footprint relative to Electron-based alternatives.
How Do You Install and Set Up Warp Terminal?
Getting started with Warp terminal setup takes under 5 minutes across all major platforms, whether you need Warp terminal commands on macOS, want to know how to install Warp Terminal in Kali Linux, or need to set Warp as default terminal Windows.
macOS (Homebrew)
brew install --cask warpmacOS (Direct Download)
Download the .dmg from warp.dev, drag to Applications, and launch.
Linux
# Debian/Ubuntu
sudo apt install warp-terminal

# Arch Linux
yay -S warp-terminal

# Or download directly from warp.dev/linux
Windows
Warp now supports Windows with full feature parity. Download the installer from warp.dev/windows or use winget:
winget install Warp.WarpFirst Launch Configuration
On first launch, Warp asks you to create an account. Yes, this is required for full functionality-it’s how Warp syncs settings, enables AI features, and powers Warp Drive collaboration. If this bothers you, alternatives are covered later in this guide.
After authentication, spend 2 minutes in Settings (⌘ + ,) to:
- Set your default shell (bash, zsh, fish, or PowerShell)
- Import existing configurations (Warp can read your
.zshrc,.bashrc, etc.) - Choose a theme (30+ built-in themes, or create custom)
- Configure AI model preferences (choose between OpenAI, Anthropic, or Google models)
Core Features: The Blocks System
In this warp terminal guide, the blocks interface is the most important feature to understand. Every command you run creates a block with:
- Command header: Shows the exact command, timestamp, and exit status
- Output body: The command’s stdout/stderr, filterable and searchable
- Action buttons: Copy output, share block, or save as snippet
Navigating Blocks
| Action | Shortcut |
|---|---|
| Select previous block | ⌘ + ↑ |
| Select next block | ⌘ + ↓ |
| Search within block | ⌘ + F |
| Copy entire block output | ⌘ + Shift + C |
| Filter block output | Type to filter when block selected |
Why Blocks Matter for Productivity
Consider a common scenario: you run a failing test suite and need to find the specific error. In a traditional terminal, you scroll through hundreds of lines. In Warp:
- Run
npm test - Press ⌘ + ↓ to select the block
- Type “Error” to filter-now you see only lines containing “Error”
- Press ⌘ + Shift + C to copy those filtered lines
That workflow takes 5 seconds instead of 30+ seconds of scrolling and manual selection.
AI Agent Features: Your Command Line Copilot
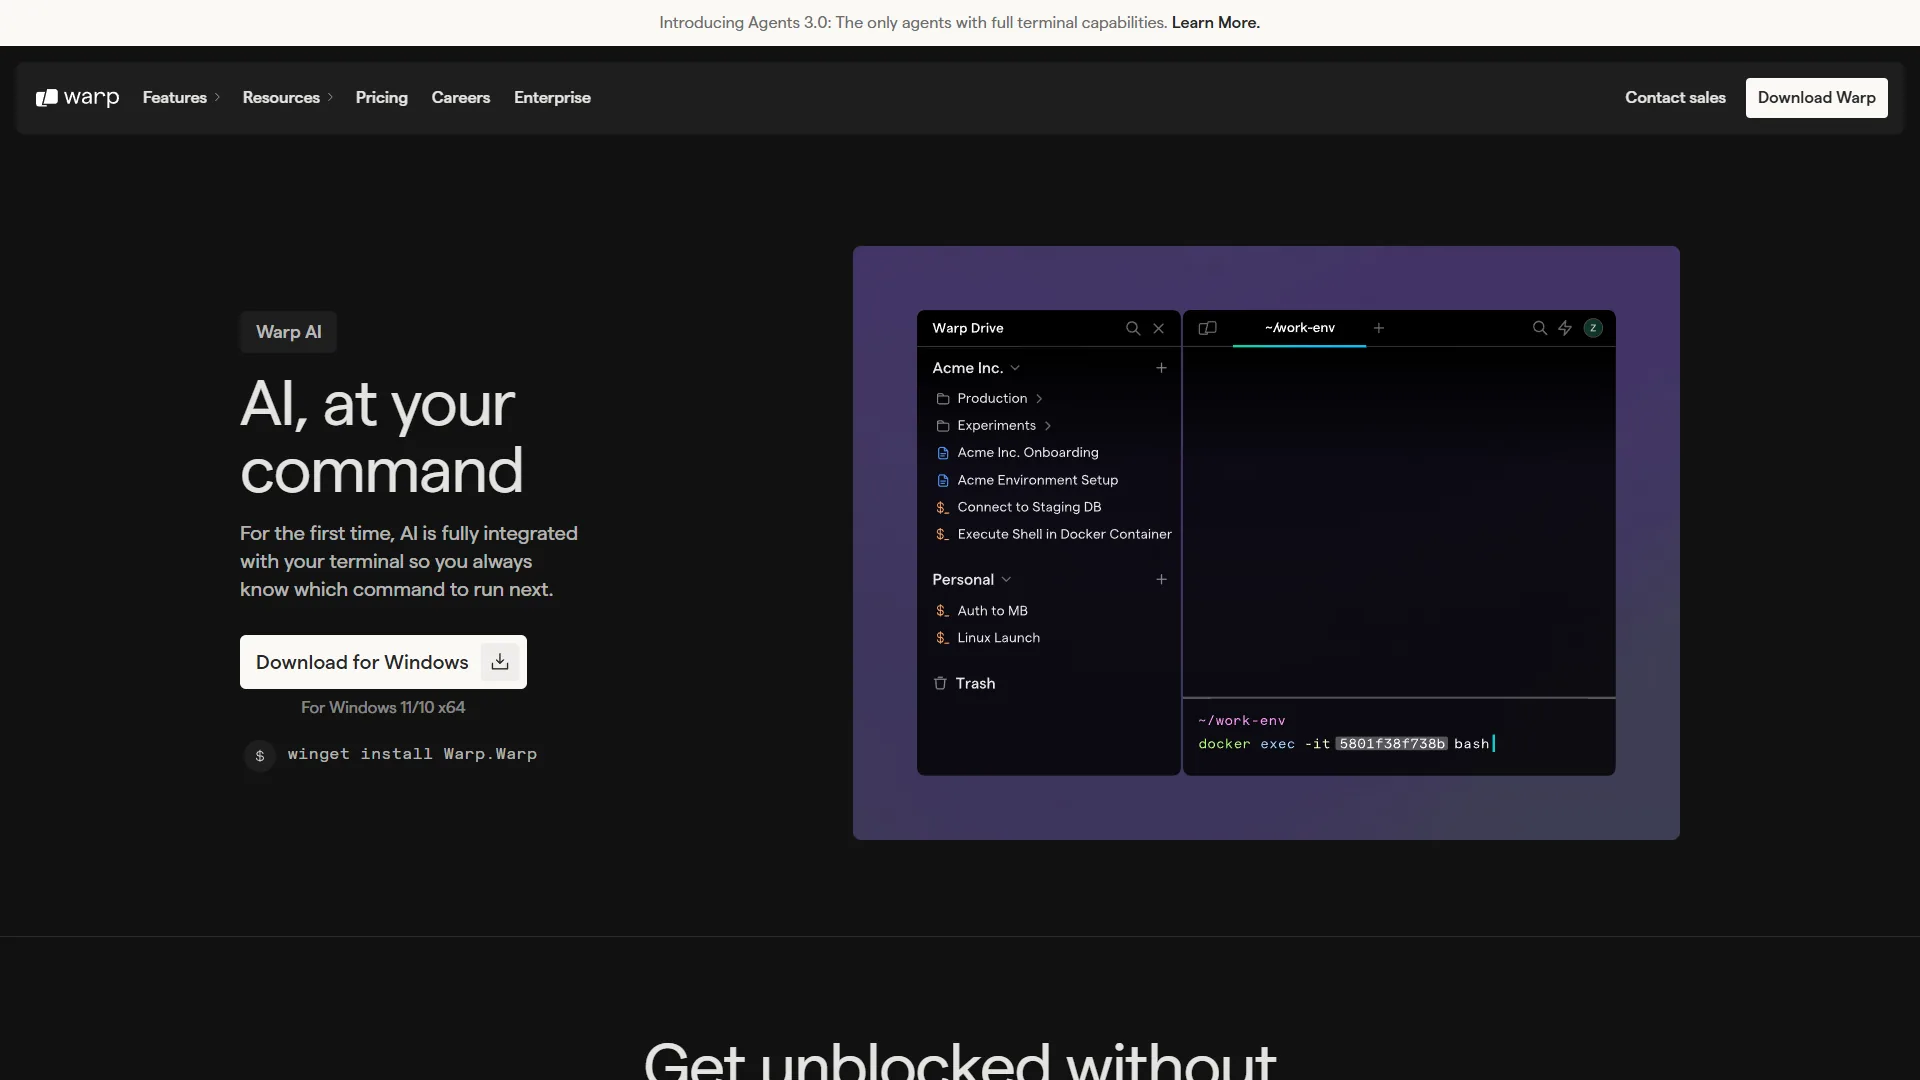
Warp’s AI features are accessed via ⌘ + I or by clicking the AI button. There are three main modes:
1. Command Generation
Type what you want to do in plain English, and Warp generates the command:
Input: “compress all jpg files in this directory to 80% quality”
Output:
find . -name "*.jpg" -exec mogrify -quality 80 {} \;This alone justifies using Warp. Instead of Googling “imagemagick compress quality command line,” you get the exact command with your specific requirements baked in.
2. Error Debugging
When a command fails, highlight the error and press ⌘ + I. Warp analyzes the error in context:
Example error:
error: EACCES: permission denied, mkdir '/usr/local/lib/node_modules'AI explanation: “This error occurs because npm is trying to install a global package in a system directory without root permissions. You have three options:
- Run with sudo (not recommended for security reasons)
- Change npm’s default directory to a user-owned location
- Use a version manager like nvm that installs packages in your home directory
Recommended fix:
mkdir ~/.npm-global
npm config set prefix '~/.npm-global'
export PATH=~/.npm-global/bin:$PATH
```"

### 3. Agents 3.0: Autonomous Task Execution

The newest addition to Warp is **Agents 3.0**, which can execute multi-step tasks autonomously. Unlike simple command generation, agents can:

- Browse files and understand project structure
- Execute commands and analyze results
- Edit files based on outcomes
- Dispatch sub-agents for parallel tasks

**Example agent workflow:**

You: "Set up a new React project with TypeScript, Tailwind CSS, and configure ESLint with Airbnb rules"

The agent will:
1. Run `npx create-react-app my-project --template typescript`
2. Navigate into the directory
3. Install Tailwind and configure `tailwind.config.js`
4. Install ESLint plugins and create `.eslintrc.json`
5. Update `package.json` scripts
6. Report completion with a summary of changes

This is genuinely transformative for repetitive setup tasks that previously required following 10-step tutorials. Compared to coding-specific assistants we cover in [GitHub Copilot vs Cursor](/blog/github-copilot-vs-cursor/), Warp's agents focus on the shell rather than the editor - if you live primarily inside an editor, [Cursor](/tools/cursor/) is a closer substitute, while Warp complements it on the shell side.

## Workflows and Runbooks

Warp Workflows (formerly called Runbooks) let you save and share multi-step command sequences. They're like shell scripts, but with:

- **Interactive prompts**: Ask for input before running
- **Documentation inline**: Explain what each step does
- **Parameterization**: Variables that users fill in at runtime
- **Warp Drive sync**: Share workflows across your team

### Creating a Workflow

1. Run a series of commands you want to save
2. Select multiple blocks (Shift + click)
3. Click "Save as Workflow"
4. Add descriptions, parameters, and prompts

### Example: Database Backup Workflow

```yaml
name: "Backup Production Database"
description: "Creates a timestamped backup of the production database"
parameters:
  - name: DB_NAME
    prompt: "Database name to backup"
    default: "production_db"
  - name: BACKUP_PATH
    prompt: "Local path for backup"
    default: "~/backups"
steps:
  - command: "mkdir -p {{BACKUP_PATH}}"
    description: "Create backup directory if it doesn't exist"
  - command: "pg_dump {{DB_NAME}} > {{BACKUP_PATH}}/{{DB_NAME}}_$(date +%Y%m%d_%H%M%S).sql"
    description: "Dump database with timestamp"
  - command: "ls -la {{BACKUP_PATH}}/{{DB_NAME}}*.sql | tail -5"
    description: "Show recent backups"
Warp Drive: Team Collaboration
Warp Drive is where you store and share:
- Workflows: Reusable command sequences
- Snippets: Individual commands with documentation
- Environments: Shared environment variables (securely encrypted)
- Notebooks: Documentation with embedded runnable commands
For teams, this eliminates the “how do I deploy again?” Slack messages. New developers can browse Warp Drive and run the “Setup Local Environment” workflow instead of following outdated wiki pages.
Essential Keyboard Shortcuts
Warp is designed for keyboard-first interaction. These shortcuts will make the biggest difference:
Navigation
| Action | macOS | Windows/Linux |
|---|---|---|
| New tab | ⌘ + T | Ctrl + T |
| Close tab | ⌘ + W | Ctrl + W |
| Split pane vertically | ⌘ + D | Ctrl + D |
| Split pane horizontally | ⌘ + Shift + D | Ctrl + Shift + D |
| Switch panes | ⌘ + Option + Arrow | Ctrl + Alt + Arrow |
| Command palette | ⌘ + P | Ctrl + P |
AI and Blocks
| Action | macOS | Windows/Linux |
|---|---|---|
| Open AI assistant | ⌘ + I | Ctrl + I |
| Select block | ⌘ + ↑/↓ | Ctrl + ↑/↓ |
| Copy block output | ⌘ + Shift + C | Ctrl + Shift + C |
| Search in block | ⌘ + F | Ctrl + F |
| Clear terminal | ⌘ + K | Ctrl + K |
Editing
| Action | macOS | Windows/Linux |
|---|---|---|
| Multi-cursor select | Option + Click | Alt + Click |
| Select word | Double-click | Double-click |
| Move cursor by word | Option + ←/→ | Ctrl + ←/→ |
| Delete word | Option + Backspace | Ctrl + Backspace |
Pro tip: Warp supports IDE-style multi-cursor editing. Option + Click to place multiple cursors, then type to edit all positions simultaneously. This is invaluable for editing multi-line commands.
Pricing Deep Dive: Warp Terminal Guide to Plans
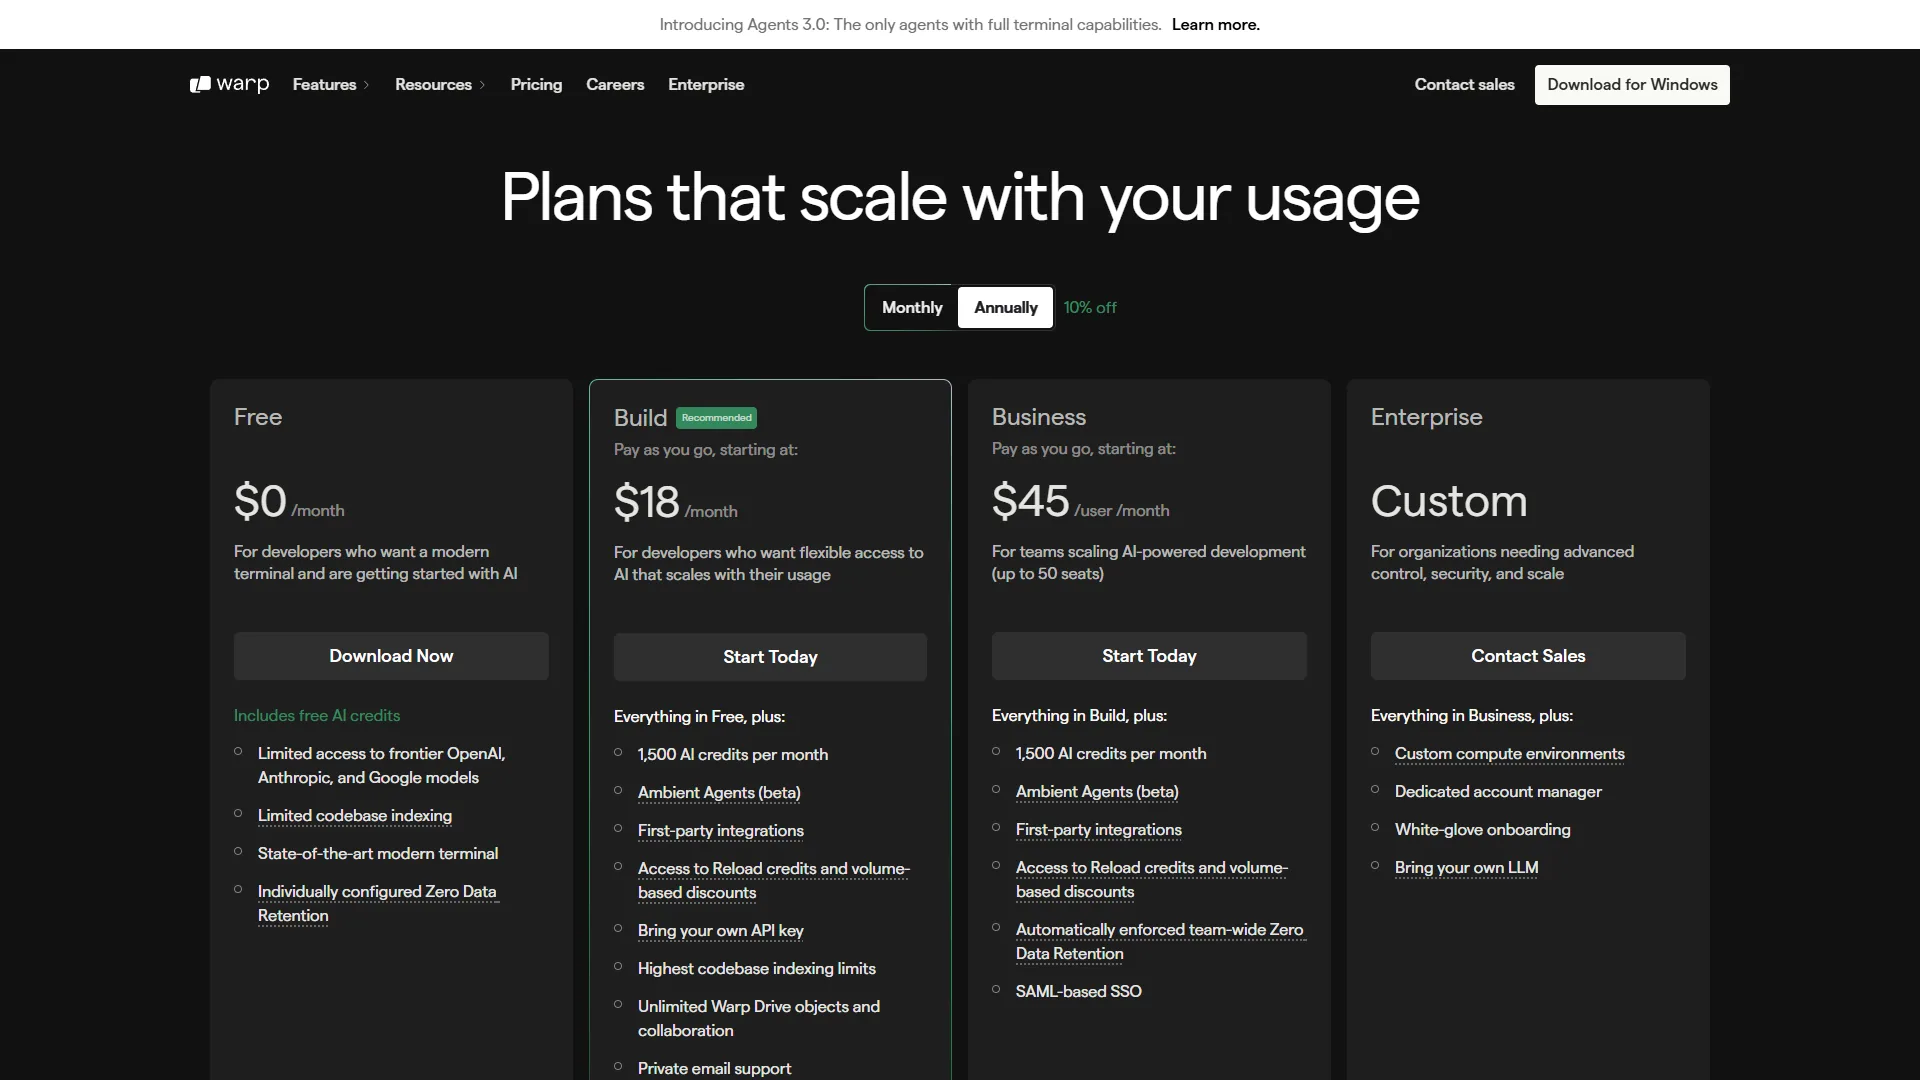
Understanding Warp’s pricing requires understanding AI credits-the currency that powers AI features.
Free Tier
- Price: Free
- AI Credits: 150/month for first 2 months, then 75/month
- Includes: Full terminal features, basic Warp Drive, all keyboard shortcuts
- Best for: Developers who want to evaluate Warp or use AI sparingly
The free tier is genuinely usable, not a crippled trial. All core terminal functionality works without limits. The 75 monthly AI credits translate to roughly 75 command generations or error explanations.
Build Tier
- Price: $18/month
- AI Credits: 1,500/month (roll over for 12 months)
- Includes: BYOK (Bring Your Own API Key), unlimited Warp Drive, Agents 3.0 with full capabilities
- Best for: Individual developers who use AI features daily
At the Build tier price, it makes sense if you’re using AI features more than 3-4 times per day. The BYOK option is particularly valuable-connect your own OpenAI, Anthropic, or Google API keys and bypass credit limits entirely.
Business Tier
- Price: Per-user, sales-led (request a quote)
- AI Credits: 1,500/month per user
- Includes: SSO, Zero Data Retention (ZDR), shared credits pool
- Best for: Teams of 5-50 needing admin controls
The Business tier adds enterprise compliance features. Zero Data Retention means your commands and AI conversations are never stored on Warp’s servers-critical for regulated industries. For broader Mac-focused productivity tooling, our best Mac productivity tools 2026 guide pairs well with Warp’s developer workflow features, and the Warp ZDR explainer walks through the encryption architecture if compliance review is on your plate.
Enterprise Tier
- Price: Custom (contact sales)
- Includes: SAML SSO, SCIM provisioning, dedicated support, custom security requirements
- Best for: Organizations with strict compliance needs (SOC 2, etc.)
Is Warp Worth the Build Tier Price?
Let’s do the math. If Warp saves you 1 hour per week (conservative estimate based on my usage), that’s 4 hours per month. At even a $50/hour rate, the time value you get far exceeds the monthly subscription cost. At $100/hour, the ROI is 10x or more.
The question isn’t whether Warp is worth it - it’s whether you’ll actually use the AI features enough to justify paying vs. staying on the free tier.
Warp vs. Alternatives
How does Warp compare to other terminal options? Here is an honest assessment:
Is Warp Better Than iTerm2?
iTerm2 advantages:
- Completely free and open source
- No account required
- More customization options
- Lighter resource usage
- Mature split-pane and profile management
Warp advantages:
- AI-powered command generation and debugging
- Modern blocks-based UI
- Team collaboration via Warp Drive
- Better out-of-box experience (no configuration needed)
- Cross-platform (iTerm2 is macOS only)
Verdict: If you’re a power user who’s already customized iTerm2 exactly how you like it and don’t want AI features, stay with iTerm2. If you want AI assistance and a modern interface without configuration, choose Warp.
Warp vs. Ghostty
Ghostty (Zig-based terminal) is getting attention for its performance:
Ghostty advantages:
- Open source
- Minimal resource usage
- Blazing fast rendering
Warp advantages:
- AI integration (Ghostty has none)
- Blocks interface
- Team features
- More polished out-of-box experience
Verdict: Ghostty is for minimalists who want raw speed. Warp is for developers who want AI productivity gains.
Warp vs. VS Code Terminal
Many developers live in VS Code’s integrated terminal:
VS Code Terminal advantages:
- Zero context switching from editor
- Inherits VS Code extensions
- Free
Warp advantages:
- Better terminal-specific UX (blocks, AI commands)
- Dedicated keyboard shortcuts for terminal operations
- Works with any editor/IDE
- Superior multi-pane management
Verdict: Use Warp alongside VS Code. Set Warp as your external terminal (terminal.external.osxExec) for complex terminal work while keeping VS Code’s integrated terminal for quick commands. The VS Code integrated terminal docs cover the configuration knobs you need to point at Warp cleanly.
Troubleshooting Common Issues
”AI credits depleted” Error
If you’ve exhausted your monthly credits:
- Wait for reset (credits reset on billing cycle)
- Purchase Reload Credits (available in Build+ tiers)
- Enable BYOK (Settings → AI → Bring Your Own Key)
High Memory Usage
Warp uses more RAM than minimal terminals. If it’s causing issues:
- Reduce scrollback buffer: Settings → Terminal → Scrollback Lines (default: 10,000)
- Clear terminal regularly: ⌘ + K
- Close unused tabs: Each tab maintains its own scrollback
Shell Configuration Not Loading
If your .zshrc customizations aren’t appearing:
- Check Settings → Profiles → ensure correct shell is selected
- Verify Warp is using login shell: Settings → Terminal → “Run as login shell”
- Restart Warp after configuration changes
SSH Connections Timing Out
Warp handles SSH sessions differently than traditional terminals:
- Enable “Keep SSH connections alive”: Settings → Terminal → SSH Keep-Alive
- Add to your
~/.ssh/config:
Host *
  ServerAliveInterval 60
  ServerAliveCountMax 3
Advanced Tips for Power Users
Custom WARP.md Project Files
Create a WARP.md file in your project root to give the AI context about your codebase:
# Project Context

This is a Next.js 14 application using:
- TypeScript
- Prisma ORM
- PostgreSQL
- Tailwind CSS

## Common Commands
- `npm run dev`: Start development server
- `npm run db:migrate`: Run database migrations
- `npm test`: Run test suite

## Deployment
We deploy to Vercel via GitHub integration.
When you open a terminal in this directory, Warp’s AI reads this context file and gives more relevant suggestions.
Linking Warp with Raycast
For ultimate productivity, combine Warp with Raycast:
- Install Raycast’s Warp extension
- Use Raycast to search and open Warp Workflows
- Chain Raycast AI commands with Warp terminal actions
Our essential Raycast extensions for developers breakdown lists more developer-focused launchers worth pairing with Warp.
If your dev workflow includes shipping content alongside code (DevRel, indie hackers, founder-led growth), pairing Warp with a scheduler keeps the publish step out of your terminal context: Later handles visual social planning, while Buffer is the lighter-weight scheduling option if you mostly need queue-based posting.
Creating Custom Themes
If built-in themes don’t satisfy you:
- Create
~/.warp/themes/my-theme.yaml - Define colors following Warp’s theme schema
- Restart Warp and select your theme in Settings → Appearance
Who Should Use Warp?
Warp is ideal for:
- Developers who want AI assistance without leaving the terminal
- Teams that need to share workflows and commands
- Beginners who find traditional terminals intimidating
- Anyone tired of Googling command syntax
Warp might not be for you if:
- You need a completely offline terminal
- Account requirements are a dealbreaker
- You prefer minimal, highly customizable terminals
- Resource usage is a critical concern
Final Thoughts
As this warp terminal guide has shown, Warp represents a genuine evolution in how developers interact with the command line. The combination of the blocks interface, AI-powered command generation, and team collaboration features creates productivity gains that compound over time.
Is it perfect? No. The account requirement bothers some users, and power users may miss iTerm2’s extensive customization. But for the majority of developers who want a modern terminal that helps them work faster without configuration headaches, Warp delivers.
Start with the free tier. Use it for a week. If you find yourself reaching for the AI assistant multiple times per day, upgrade to Build. The subscription pays for itself many times over in saved time and reduced frustration.
Want to learn more about Warp?
Frequently Asked Questions
How do you clear the terminal in Warp?
To clear the terminal in Warp, use ⌘ + K on macOS or Ctrl + K on Windows and Linux. Unlike traditional terminals, this clears the visible blocks but keeps your command history accessible via ⌘ + R for reverse search.
How do you use Warp as your default terminal?
On macOS, open System Settings → Privacy & Security → Files and Folders → grant Warp full disk access, then update any shell scripts that explicitly call Terminal.app to point at Warp. On Windows, set Warp as default in Settings → Apps → Default apps. Warp imports your existing .zshrc or .bashrc automatically on first launch.
Is Warp better than iTerm2?
Warp wins on AI command generation, blocks-based UI, and team collaboration via Warp Drive. iTerm2 wins on offline use, no account requirement, and lighter resource usage. If you spend more than an hour daily in the terminal and use AI assistants regularly, Warp’s productivity gains outweigh the account requirement. If you’ve already deeply customized iTerm2, the switching cost may not be worth it.
What are the system requirements for Warp Terminal?
Warp requires macOS 11+ (Apple Silicon or Intel), Windows 10/11, or Ubuntu 20.04+/Fedora 35+ on Linux. It uses approximately 200-400MB of RAM at idle, more with active AI sessions. A persistent internet connection is required for AI features and account sync, though core terminal functionality works offline once you’ve authenticated.
Does Warp terminal require an account to use?
Yes, an account is required for full functionality. Warp uses it to sync settings, enable AI features, and power Warp Drive collaboration. The free tier is genuinely usable and not a crippled trial - all core terminal functionality works without limits, including roughly 75 monthly AI credits.
Related Guides
- Essential Raycast Extensions for Developers
- Best AI Coding Assistants
- Best Mac Productivity Tools 2026
- GitHub Copilot vs Cursor: Which AI Coding Tool Wins?
External Resources
Related Guides
- 15 Calendly Tips and Tricks to Save 4+ Hours Weekly
- Claude Code Hooks Guide: PreToolUse, PostToolUse, Stop
- Claude Code Tips and Tricks (2026): 10 Power Workflows
- Cursor AI Productivity Tips 2026 - 12 Hacks Compared
- ElevenLabs API Setup: Developer Quick Start Guide (2026)
- ElevenLabs Python SDK Tutorial: Complete 2026 Guide
- GitHub Actions Tutorial: Build a CI/CD Pipeline Fast
- Keyboard Workflow Optimization: Complete 2026 Guide
- Later Tips and Tricks: Master AI Captions and More
- LinkedIn Content Tips 2026: 10 Proven Hooks (Free Guide)